Dahua repainting

nl635

n3wb
Joined
Nov 23, 2021
Messages
12
Reaction score
6
Location
Slovakia
Hi,

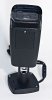
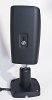
Do you have any experience with repainting of dahua cameras? Thing is that here in Slovakia are somehow available only white cameras, which really doesnt fit into house design. So I am thinking of buying white cameras like dahua 2231 and spray them with brown or black color.

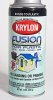
Question is, what is best method to respray them in the way that color will be stable over years...
 

wittaj

IPCT Contributor
Joined
Apr 28, 2019
Messages
24,941
Reaction score
48,654
Location
USA
Many here repaint them.

Some go all out and rough it up with some fine sandpaper and some cleaner and apply a coat and wait a day and paint another.

Some go with the kind of paint that peels off if you need to take it off in the future (forget what it is called right now).

Some just start painting them with no prep.

I have done all 3 and personally I haven't seen a difference after years in operation, so now I just paint it with no prep - I have done spray and brush and both hold up the same.
 

sebastiantombs

Known around here
Joined
Dec 28, 2019
Messages
11,511
Reaction score
27,693
Location
New Jersey
I've painted a half dozen or so, both bullets and turrets. I take the turret cameras apart to the three main pieces, baseplate, shroud and ball. Then I mask the lens, mic hole (if there is a mic) and the wiring pigtail. Next is a light sand with 220 grit of everything followed by a wipe down with paint thinner then denatured alcohol. I usually use three to four light coats of paint and allow each coat to dry for a day. Paint is normally Rustoleum which is an enamel based paint. I would say to avoid lacquer based paints like Krylon because the amount of lacquer thinner in those paints will attack the paint that's already on the camera and make it bubble and craze.
 

Parley

Known around here
Joined
Dec 19, 2015
Messages
5,623
Reaction score
16,013
Location
Cypress, California
I used Rustoleum lately and the only problem was with the black paint used on the logo. It wanted to bubble up. However, this was a Hikvision camera.
 

Mike A.

Known around here
Joined
May 6, 2017
Messages
3,828
Reaction score
6,387
The key is multiple very light coats and letting things cure well. Resist the urge to do "just a little more there." That's the majority of your problems will happen. However close you think that you need to be, move back a little. Shoot it light like a fine dusting. Let it dry well past flashing off. Repeat until done. Then let it sit for at least a day or more before you try to reassemble. A bullet you can get away with less curing time. Turrets you need to let cure very well otherwise it may peel from the friction when rotated in the hood. Along the same lines with a turret, be a little gentle with it when adjusting after. The paint adds a little thickness so loosen things more when adjusting and then lock it down when it's where you want it.

Plasti-dip comes out too thick and isn't strong enough to use with a turret. Tried one and that was a complete failure. With a bullet you also can do a wrap. That worked well for me with a couple and is relatively easy to do without disassembling things much. You can spray the base. Can't really do that with a turret.
 

Alaska Country

Getting comfortable
Joined
Jun 10, 2021
Messages
452
Reaction score
657
Location
Alaska
Painting the 5442 Bullet

The procedure to paint is the same as stated above.

Remove covers, bottom camera hinged door, mask, sand, clean, lightly spray paint and dry. Used a flat black paint designed for plastic painting.

The body of the bullet is black once the covers are removed. The camera could be used without the covers by only painting the base and bottom access door and not reinstalling the top or bottom covers.

The top cover (lens shield) is attached with one screw. The bottom cover is removed by slipping a credit card between the body and cover near the back and front to pop off the bottom cover.

The bottom door that covers the reset switch can be left in place, masked and painted. Or removed from the camera bottom by removing the two Phillips screws on the left and right that act as hinges. These are fine threaded so use caution in removal and replacement.

body-masking.jpg
camera-body-no-covers.jpg
camera-bottom.jpg
camera-top.jpg
reset-door.jpg
finished-bottom.jpg
finished-top.jpg
paint-can.jpg
 

CCTVCam

Known around here
Joined
Sep 25, 2017
Messages
2,674
Reaction score
3,504
Some go with the kind of paint that peels off if you need to take it off in the future (forget what it is called right now).
I believe it could be plastidip but check the can before using!
 
Top