Anyone run 2 ethernet wires through the junction box grommet?

AlwaysSomething

Pulling my weight
Apr 24, 2023
155
117
US
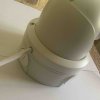
Has anyone run the cameras cable plus an additional Cat 6 cable through the single junction box grommet at the same time? In other words 2 cables in the same hole? Here's pictures because I don't know how else to describe this.

If you look at the following picture, I'd rather not put the coupler on the junction box for the Cat 6 and just run it in the hole provided by the camera (circled).

IMG_5331.jpeg

Here is a mock up of what I am thinking of doing

1724166841280.jpeg

There is a gap where there is a break in the grommet that I can fill with silicone caulk and this will be under an eave/soffit so shouldn't get any moisture other than relative humidify. I will put dielectric grease in the actual connector and use the provided joint protector. My bigger concern is it "pinching" the Cat 6 cable as you can see in this picture:

1724167025245.jpeg

And the blue cable in the picture is not the outdoor rated cable. For the actual install I will be using outdoor rated Cat 6 which is thicker.

I would keep the cameras cable in the center of the hole so that if anything does get damaged it will be the Cat 6 which can easily be replaced cut and new connector installed (providing some slack inside the eave.

Anyone do this and ever have an issue? I tried squeezing the Cat 6 closer to the camera cable but once you start closing the grommet it pushes it out.
 
  • Like
Reactions: mat200
Has anyone run the cameras cable plus an additional Cat 6 cable through the single junction box grommet at the same time? In other words 2 cables in the same hole? Here's pictures because I don't know how else to describe this.

If you look at the following picture, I'd rather not put the coupler on the junction box for the Cat 6 and just run it in the hole provided by the camera (circled).

View attachment 201530

Here is a mock up of what I am thinking of doing

View attachment 201532

There is a gap where there is a break in the grommet that I can fill with silicone caulk and this will be under an eave/soffit so shouldn't get any moisture other than relative humidify. I will put dielectric grease in the actual connector and use the provided joint protector. My bigger concern is it "pinching" the Cat 6 cable as you can see in this picture:

View attachment 201533

And the blue cable in the picture is not the outdoor rated cable. For the actual install I will be using outdoor rated Cat 6 which is thicker.

I would keep the cameras cable in the center of the hole so that if anything does get damaged it will be the Cat 6 which can easily be replaced cut and new connector installed (providing some slack inside the eave.

Anyone do this and ever have an issue? I tried squeezing the Cat 6 closer to the camera cable but once you start closing the grommet it pushes it out.

I absolutely don’t understand the why?!? :facepalm:
 
  • Haha
Reactions: duplo
I absolutely don’t understand the why?!? :facepalm:

This is going on my home and not a commercial building. I'd like to keep the install as "clean" and professional looking as possible. Imagine this under a white eave.

1724179193351.jpeg

1724179297247.jpeg

I don't want it looking like a fly by night contractor installed it.

Honestly, considering this is going under an eave I don't even think the grommet will serve much purpose and probably not even needed. The water would have to get in there and then travel straight UP. I was looking at it in my counter thinking water could get DOWN into it but that's not the case.

I guess next question is do I even need the grommet? It can't hurt.
 

Attachments

  • 1724179236524.jpeg
    1724179236524.jpeg
    264.7 KB · Views: 4
  • Like
Reactions: mat200
Realize that the gromet not only attempt to keep water out, it also attempts to keep bugs, like ants, out.

It might be prudent to enlarge the gromet hole a little so that nothing is pinched. I would advise a drip loop in the cable before it enters that little knockout at the cam base. does not need to be large. Just enough to make water drip rather than continue on to the box.
 
  • Like
Reactions: mat200
I actually had a small loop in there to slip the camera on.

As far as out the back of the box that would assume I know its final position. I read a few threads on this site about mounting under and eave and even posted a question here:


I am going to use the flat stock method so I can move the camera to see where it would be best. Since I don't know the final location I don't want to go out the back of the box. I thought of having having a temporary cable hanging down over night while I test (and before I drill) but I have some crappy kids/neighbors that would probably cut the cable on me.

Hope that makes sense.

I guess I can go out the back and see if it fits in the "V" of the soffits. If the spot does work out just plug the hole. Hopefully not to many holes.

It's starting to sound like people just pick a spot, mount it, and call it a day.
 
  • Like
Reactions: mat200
It's starting to sound like people just pick a spot, mount it, and call it a day.
I ALWAYS use a test rig prior to actually mounting the cam. Day and night.
 
  • Love
Reactions: mat200
That's what I was trying to do and not drill a bunch of holes in the soffits as I move the camera around to test it. I guess I'll remove the side knock out during testing and then when it's in it's final location I can go out the back. Then at most I'll have 1 hole to fill. Maybe 2 holes since 2 cameras.
 
  • Like
Reactions: mat200
That's what I was trying to do and not drill a bunch of holes in the soffits as I move the camera around to test it. I guess I'll remove the side knock out during testing and then when it's in it's final location I can go out the back. Then at most I'll have 1 hole to fill. Maybe 2 holes since 2 cameras.
You can mount a 2x4 to the soffit and move the camera around on that before you decide on the final location. Then you just have 2 holes to fill.
 
  • Love
Reactions: mat200
This is going on my home and not a commercial building. I'd like to keep the install as "clean" and professional looking as possible. Imagine this under a white eave
I don't want it looking like a fly by night contractor installed it.
Honestly, considering this is going under an eave I don't even think the grommet will serve much purpose and probably not even needed. The water would have to get in there and then travel straight UP. I was looking at it in my counter thinking water could get DOWN into it but that's not the case.
I guess next question is do I even need the grommet? It can't hurt.

That is why I drill a 3/4 inch hole and run the cable in the attic. Rarely I have used surface mount in a install, but when I did I used flat conduit as it has a better clean line look than attaching a wire every 16 inches to a flat surface. On eaves I shoot for about half way from the wall.

But knowing your equipment's capability first before deploying it is essential, but typically I use a 2.8mm lens and if I need more view I will switch to a fish-eye or an interactive PTZ

But if I can't judge the positioning, I use 2 inch sticky back Velcro on a spare camera and WD40 to dissolve the sticky when it comes time to remove it. But rarely this is even an issue because its easy to judge what a camera sees with positioning yourself on a ladder and looking from the angle the camera is going to go.
 
  • Like
Reactions: mat200
5gal bucket, 8-10ft 2x4, rocks for ballast makes a temporary stand for testing cameras.
ALWAYS test a proposed location before permanent mounting for at least 24hrs, longer time is better. While recording so you can review if anything unexpected crops up.
 
My test rig. You do not need to run the cable in its permanent configuration. Out a door or window works just fine.

Test Rig.JPG
 
  • Love
Reactions: mat200