Few simple Q's about Dahua install junction box

forumviewer

Young grasshopper
Mar 23, 2021
49
23
USA
Friends,

I am preparing to install some Dahua bullets and turrets using Dahua's junction boxes (PFA-121 for bullet and PFA-122 for turret).

I want to make sure I do this right the first go around when it comes to physical installation. I hope that you'll be kind enough to answer a few simple questions:

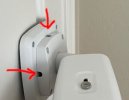
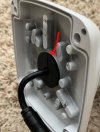
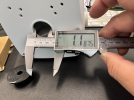
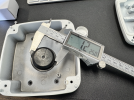
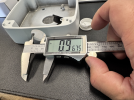
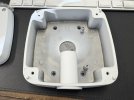
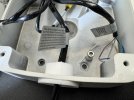
  1. The bullet trim that mounts to the junction box has two holes, one on two of the four sides, as seen in the attached picture. Where should these be positioned when mounting this to the back-piece of the junction box? What are their functionality and purpose? I assume it has to do with water or moisture so it seems wrong to have a hole pointing "up" toward the sky as in the picture. However, if I have it "down" toward the ground, then the lock/unlock screw is at the top on the sky side rather than ground side. See pictures.
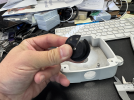
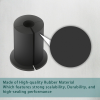
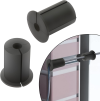
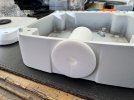
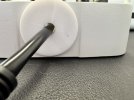
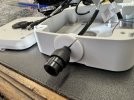
  2. There is a rubber piece that goes in the junction box circular hole that the camera cables come through. Does this get pushed into place from the backside (where the cables end up) or from the front side (where the cables come from)? See picture example of it being installed on the backside. See picture.
 

Attachments

  • Screenshot_2024-10-12_09-42-43.jpg
    Screenshot_2024-10-12_09-42-43.jpg
    11 KB · Views: 19
  • Screenshot_2024-10-12_09-46-46.jpg
    Screenshot_2024-10-12_09-46-46.jpg
    48.4 KB · Views: 19
  • Screenshot_2024-10-12_09-51-37r.jpg
    Screenshot_2024-10-12_09-51-37r.jpg
    13.4 KB · Views: 19
Also should I chalk/silicone anywhere such as on the top once installed on the wall to prevent water from getting into the junction box?
 
Also should I chalk/silicone anywhere such as on the top once installed on the wall to prevent water from getting into the junction box?
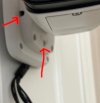
1. I have mine oriented as in the attached photo. I assume the openings are there to run another cable in or out for another camera or accessory like an IR light. 2. Yes, the rubber piece gets inserted from the back to make a water-tight seal. The rubber seal works well at keeping out moisture, so I haven't ever used a sealant (silicone, etc.).
 

Attachments

  • orientation.jpg
    orientation.jpg
    471.5 KB · Views: 29
1. I have mine oriented as in the attached photo. I assume the openings are there to run another cable in or out for another camera or accessory like an IR light. 2. Yes, the rubber piece gets inserted from the back to make a water-tight seal. The rubber seal works well at keeping out moisture, so I haven't ever used a sealant (silicone, etc.).
To be clear, you also have a hole at the top side as well (same orientation as my photo where there is a hole at the top and hole on the "left" side when looking at it directly like your photo.
 
To be clear, you also have a hole at the top side as well (same orientation as my photo where there is a hole at the top and hole on the "left" side when looking at it directly like your photo.
Yes, that is correct (top and side). The lock/unlock screw should be oriented downward. You can test how resistant it is to water intrusion by inserting an ethernet cable into the rubber grommet and then into the mount. On all my boxes it has provided a water-tight seal without having to use additional silicone/caulking.
 
  • Like
Reactions: looney2ns
Lock screw orientation doesn’t bother me so I install with one of the holes facing down to drain any water that gets in. I silicone caulk camera base to junction box faceplate leaving bottom hole open. Caulk over side hole.

I also silicone the rubber plug in place along with silicone around the wire as well.