looney2ns
IPCT Contributor
Many places online to order custom signs.Forget the post, where did he get that sign?
Many places online to order custom signs.Forget the post, where did he get that sign?
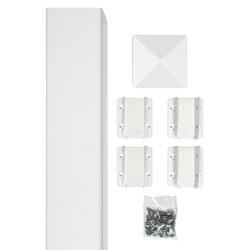
I used this post sleeve from Menards.Ri22o where did you get your post from? I have an idea for this to put a unifi camera into at the end of my yard.
How did you do that?
Did you had the hose ready, or you had to dig and get into the house under the foundations?
Looks like a great install, judging by the hose diameter (3/4) if i'm guessing correctly, you can even use more cables if you will need in the future.

Forget the post, where did he get that sign?

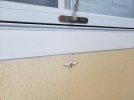
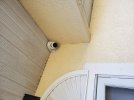
Ok, my question is, how did you get ethernet cable to the front door camera? I have a similar situation where I need to get ethernet cable to, but I can't see how to get cable there. There is a simple doorbell switch there. You can see where the cam is currently, but it does a wonderful job of getting the top of their hearView attachment 221609
I ran rigid conduit from my basement and then converted to the liquid tite conduit.
Not gonna happen here - no basements in FloridaI have an unfinished utility area in the basement right at the front door, so I just came up through the bottom plate and wall.
Not gonna happen here - no basements in Florida

Indoor swimming pool wetyeah they tend to get a bit wet
You asked, I answered.Not gonna happen here - no basements in Florida
I appreciate the answer. Just won't work here.You asked, I answered.
That's a good question. I have to remove the soffit to see if I can access the inside of the wall. The small roof over the front door is about a foot higher than the walls. So there may be an issue with a wall extension to deal withWhat happens if you remove that soffit? Could you drill a hole in the stucco above the doorbell area to get down into the wall?