rufunky
Pulling my weight
- Joined
- Dec 2, 2015
- Messages
- 665
- Reaction score
- 232
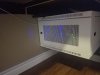
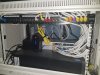
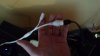
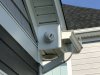
Curious how the pros go about installing cabling with a home that has access to an attic (raised ranch). Do you typically run the cable directly from the POE hub out to the cameras or do you run the cable from the POE hub to a cat junction box and then pigtail to the cameras like the picture below?
Attachments
-
 59.9 KB Views: 572
")