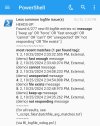
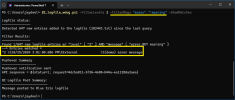
I've created a PowerShell watchdog script to monitor the Blue Iris logfile and send push notifications (via Pushover or Telegram) when entries are found that match specified values (key words). You can specify any or all of the logfile entry columns: 'severity level', 'object', and 'message'. A batch mode is also supported for multiple queries (see post #3). Additionally, a test mode is supported for experimenting with queries (see post #4).
Typically, the script would be executed every 30 minutes or so from Windows Task Scheduler. The script is very fast and is not resource intensive because it inspects only the newest logfile entries since the script's previous execution. The entire logfile is loaded into memory only on the very first execution.
This utility may be for you if you have ever discovered LONG AFTER-THE-FACT that your Blue Iris system has issues that you wish you had known about sooner, for example:
HOW TO GUIDE...
STEP #1:
Install the script and its companion 'user settings file'
NOTE: If you've never used PowerShell on your Blue Iris PC, you may first to need to change its default security policy.
Open PowerShell in Administrator mode, and type the following, then hit the Enter key:
(click here for a nice beginner's tutorial to using PowerShell).
STEP #2:
Edit the user settings file
The user settings file is named 'BI_logfile_wdog_user_settings.ps1'
STEP #3:
Test the script from the PowerShell console
3.1 - Select and copy the following command and paste it into the console.
Hit the Enter key.


3.2 - Select and copy the following command and paste it into the console.
Hit the Enter key.
3.3 - Select and copy the following command and paste it into the console.
Hit the Enter key.
The response should look like following screenshot:

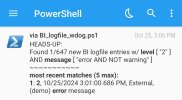
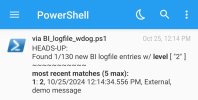
And the command should send a notification to your Pushover or Telegram device that looks like one of these 2 screenshots:

STEP #4

USAGE GUIDE Screenshots:
SCRIPT ZIP FILE:
EDIT (2024-10-26): Script updated to V2 - added file 'batch_mode_template.txt' (see post #3); minor output summary formatting fix
EDIT (2025-02-22): Script updated to V3 - new argument -PushService; improved the formatting pf notification messages; updated 'batch_mode_template.txt' (see post #6)
PLEASE NOTE: if you are updating, you must edit & use the new user-settings-file
tip: to facilitate editing, rename the existing settings file before unzipping the update.
Typically, the script would be executed every 30 minutes or so from Windows Task Scheduler. The script is very fast and is not resource intensive because it inspects only the newest logfile entries since the script's previous execution. The entire logfile is loaded into memory only on the very first execution.
This utility may be for you if you have ever discovered LONG AFTER-THE-FACT that your Blue Iris system has issues that you wish you had known about sooner, for example:
- Database corruption
- Server issues
- Drive issues (overallocated)
- Clip issues, (e.g., 'Disk can't write fast enough', 'Cannot append')
- Camera issues ('Failed to connect', 'Socket error', 'FORCE quitting camthread')
- AI issues ('AI: error', 'AI Faces: Error -1')
- MQTT 'publish' failures
- Action Set errors ('Push: failed', Write action 'error 32')
- Software update failures
- It saves timestamped results from each execution to a CSV file in the script's folder.
- It can log results to the Blue Iris logfile (optional).
- It has a convenient help guide
BI_logfile_wdog.ps1 -Help - It has a convenient examples guide
BI_logfile_wdog.ps1 -Examples
HOW TO GUIDE...
STEP #1:
Install the script and its companion 'user settings file'
- Extract all the files from the attached zip file to your desktop, or scripts folder.
- Please note that the folder used must be in your PC's environment path.
- Create a working folder for this script - it will be used to process the attachments files; to hold the script's log file, etc.
- To use the folder, you must edit a user setting
$app_pathin the user-settings script file (see STEP #2)
NOTE: If you've never used PowerShell on your Blue Iris PC, you may first to need to change its default security policy.
Open PowerShell in Administrator mode, and type the following, then hit the Enter key:
Set-ExecutionPolicy RemoteSigned(click here for a nice beginner's tutorial to using PowerShell).
STEP #2:
Edit the user settings file
The user settings file is named 'BI_logfile_wdog_user_settings.ps1'
- Open the file in a text editor (a code text editor is recommended; I use Notepad++)
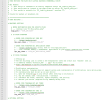
- Edit the REQUIRED SETTINGS section (see screenshot)
- Ignore the remaining settings for now. They provide customizations that you may want to explore later.
STEP #3:
Test the script from the PowerShell console
Open an Admin PowerShell window, or Powershell-ISE window
3.1 - Select and copy the following command and paste it into the console.
BI_logfile_wdog.ps1Hit the Enter key.
- The first execution will show a count of all entries the active logfile.
- Wait a few seconds (maybe longer), then repeat the command.
- Now it will show the number of new entries in the logfile.
3.2 - Select and copy the following command and paste it into the console.
BI_logfile_wdog.ps1 -ExamplesHit the Enter key.
- Look at the bottom 'TIP' section.
- Select and copy the URL.
The URL should be like,http://<ip_adress and port>/admin?log=demo%20message&level=2 - Paste the URL to the address bar in your Internet Browser
- Hit the Enter key.
This will add a new error entry to your Blue Iris logfile that we can test in the next step (3.3).
Note that you can edit the URL as desired to create ANY demo issue you want to test.
3.3 - Select and copy the following command and paste it into the console.
BI_alert_protect.ps1 -FilterLevels 2Hit the Enter key.
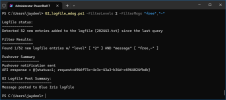
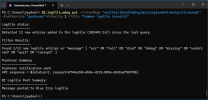
The response should look like following screenshot:
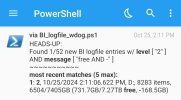
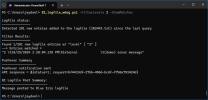
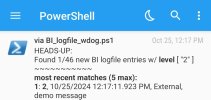
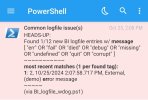
And the command should send a notification to your Pushover or Telegram device that looks like one of these 2 screenshots:


STEP #4
Automate the script from Task Scheduler.
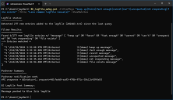
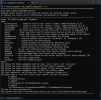
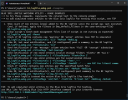
USAGE GUIDE Screenshots:


SCRIPT ZIP FILE:
EDIT (2024-10-26): Script updated to V2 - added file 'batch_mode_template.txt' (see post #3); minor output summary formatting fix
EDIT (2025-02-22): Script updated to V3 - new argument -PushService; improved the formatting pf notification messages; updated 'batch_mode_template.txt' (see post #6)
PLEASE NOTE: if you are updating, you must edit & use the new user-settings-file
tip: to facilitate editing, rename the existing settings file before unzipping the update.
Attachments
Last edited:

