HOW TO DISABLE AUTOMATIC UPDATES USING GROUP POLICY
On Windows 10 Pro, the Local Group Policy Editor includes policies to permanently disable automatic updates or change the update settings to choose when patches should be installed on the device.
Disable Windows 10 updates
To disable automatic updates on Windows 10 permanently, use these steps:
- Open Start.
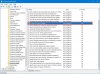
- Search for gpedit.msc and click the top result to launch the Local Group Policy Editor.
- Navigate to the following path: Computer Configuration > Administrative Templates > Windows Components > Windows Update
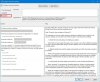
- Double-click the "Configure Automatic Updates" policy on the right side.
View attachment 140131
(Image credit: Future)
- Check the Disabled option to turn off automatic Windows 10 updates permanently.
View attachment 140133
(Image credit: Future)
- Click the Apply button.
- Click the OK button.
After you complete the steps, Windows 10 will stop downloading updates automatically. However, the ability to check for updates manually will continue to be available on
Settings >
Update & Security >
Windows Update, and clicking the
Check for updates button to download the most recent patches as needed.
If you want to enable automatic updates on the computer again, you can use the same instructions outlined above, but in
step 5, make sure to select the
Not Configured option.
Limit Windows 10 updates
The Local Group Policy Editor also lets you choose how to disable automatic updates.
To manage Windows Update automatic
downloads with Group Policy on Windows 10, use these steps:
- Open Start.
- Search for gpedit.msc and select the top result to launch the experience.
- Navigate to the following path: Computer Configuration > Administrative Templates > Windows Components > Windows Update
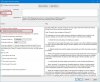
- Double-click the Configure Automatic Updates policy on the right side.
View attachment 140132
(Image credit: Future)
- Check the Enable option to turn on the policy.
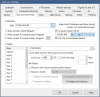
- Under the "Options" section, select the option to prevent updates from downloading automatically on Windows 10:
- 2 — Notify for download and auto install.
- 3 — Auto download and notify for install.
- 4 — Auto download and schedule the install.
- 5 — Allow local admin to choose setting.
- 7 — Auto Download, Notify to install, Notify to Restart.
View attachment 140135
(Image credit: Future)
- Quick tip: The best option to disable automatic updates is the 2 — Notify for download and auto install option, but you can make a different selection. If you choose option 2, updates won't download automatically. Instead, you will now see an "Install now" button to manually trigger an update on the Windows Update settings page.
- Click the Apply button.
- Click the OK button.
Once you complete the steps, automatic updates will be permanently disabled on Windows 10. However, when new updates become available, you can install them manually from the Windows Update settings page.

") i5-4590 with 5 "5231's" at 15fps, an
i5-4590 with 5 "5231's" at 15fps, an