Painting DS-2CD3332-I black? Suggestions

erkme73

BIT Beta Team
Joined
Nov 9, 2014
Messages
1,540
Reaction score
1,412
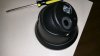
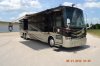
I'm planning on mounting six of the subject cameras on my motorhome.


The problem is, the exterior is primarily black. My intention is to paint them with a high-gloss black paint. But reading elsewhere, I've started to get a little nervous about the added solar heating from anything other than white.

Has anyone painted these a darker color? I have mounted on inside my 6" x 6" mailbox post, with only the lens/IR face exposed, and that hasn't been an issue.

The next concern is the durability of the paint. Does anyone have a good suggestion for paint prep, application, and brand?
 

Attachments

blake

Getting comfortable
Joined
Mar 14, 2014
Messages
1,072
Reaction score
161
Location
Texas
The key is surface prep,and a good primer coat. Krylon makes a good exterior spray paint.
 

blake

Getting comfortable
Joined
Mar 14, 2014
Messages
1,072
Reaction score
161
Location
Texas
You can order them with a black face you know.
 

erkme73

BIT Beta Team
Joined
Nov 9, 2014
Messages
1,540
Reaction score
1,412
Dang, that was fast guys. Thanks. Fenderman, yes, I read that - but didn't see where anyone actually used a given paint. I've posted there for ice to @icerabbit to reply with an update.

As for the face being black, that's a step in the right direction, but I need the entire thing, body, mount, and plastic ring/cover to be black so as not to be to gaudy on my rig.
 
Last edited by a moderator:

blake

Getting comfortable
Joined
Mar 14, 2014
Messages
1,072
Reaction score
161
Location
Texas
Well the trim ring is plastic, everything else is metal.
 

erkme73

BIT Beta Team
Joined
Nov 9, 2014
Messages
1,540
Reaction score
1,412
Been doing some additional research. Plasti-dip spray cans seem to cover really well on many different painted surfaces (people do rims and complete car paint jobs with the stuff). The best part is, it can be peeled off like a plastic wrap if/when I need to ship it back for any warranty work.
 

blake

Getting comfortable
Joined
Mar 14, 2014
Messages
1,072
Reaction score
161
Location
Texas
This is true. Only one way to find out.
 

icerabbit

Getting the hang of it
Joined
Apr 14, 2014
Messages
583
Reaction score
74
Location
FL <~> ME
Hi guys. I appreciate the mention :) Happy New Year!!!!

Great wheels! Waw! Can I have a tour? ;) [ also highly curious about the ethernet cam install & wiring on an RV!!! ]

Mine are painted chocolate / medium brown to match the "dark horse" (brown) color of paint of the wood trim.

I did not get around to the high and tricky 24ft off the ground installs that would have full exposure. Got sidetracked with other stuff, chores, overdue crap and family things.

Anyway. Fresh out of the box. Taped off the lens front part or dome bubble. Light scuffing with a scuffing sponge/pad. Automotive primer. Primer sealer. Brown spray paint. One and a half to two light coats. Rattle cans from the automotive dept from WM and finish color from Lowes/HD. Has held up great spring-summer-fall. But they are partially in the shade at least partially under the eve of the house. Now it is well below freezing. No chance of over heating.

Personally I've had good luck with Rustoleum, even though the nozzles may cause spatter at times. But, I've done a variety of electrical stuff that was light grey and needed to be black or brown or some other color with good success. Rattle, spray, done. I switched to the more elaborate and costly method after having a couple electrical boxes that I added to lamp posts peel a bit - and a short autobody class I took last year - as I wanted to minimize (avoid?) paint issues with the cameras.

Black ... they will certainly heat up! Mine were warm to hot to the touch (I'm quite heat sensitive) after leaving them out drying in the sun. Black could be tricky. I don't know at what exterior case temp they cut out ... or cook.

One thought I had to mitigate heat gain - possibly - was to paint a section of the upper part that would not be visible from eye level silver. Another thought would not work for you as you'll be going 70mph with them was to add a little light metal sun shade.
 

ADCS

Young grasshopper
Joined
Aug 31, 2014
Messages
80
Reaction score
9
Location
Toronto
Been doing some additional research. Plasti-dip spray cans seem to cover really well on many different painted surfaces (people do rims and complete car paint jobs with the stuff). The best part is, it can be peeled off like a plastic wrap if/when I need to ship it back for any warranty work.
While plastidip makes it easier to coat it would be terrible for thermal dissipation. The camera uses the chassis as a heatsink so plastidip will act as insulation....If you are going to do it use paint.

Black and white paint effectively have the same emissivity however black paint has a significantly higher absorptivity so make sure you install a solar shield if the cams are in direct sunlight.
 

icerabbit

Getting the hang of it
Joined
Apr 14, 2014
Messages
583
Reaction score
74
Location
FL <~> ME
I was just thinking today, that you might actually be able to deploy an easy / simple shade off sorts over the camera. Assuming the cameras will be installed vertically, you could in essence have a metal piece that is a rounded over rectangle, to be roughly twice the size of the camera base, folded at 90 degrees, with the section to be installed behind the base having matching holes for screws and wiring; so it would be bolted through ... and one less thing to try to secure. The hidden part to be behind the camera, you trim to be base size, to be concealed. The upper half part you can elongate, leave wider, etc depending on how much shade you need and how you want to shed water.

... just a practical thought.
 

erkme73

BIT Beta Team
Joined
Nov 9, 2014
Messages
1,540
Reaction score
1,412
Icerabbit, if this were a stationary application, I'd jump all over the solar shading idea. But since these will be stuck to the side of a box that will be doing 70+ MPH I need to avoid any additional wind loading and footprint.

I've already painted one camera with the black plasti-dip. This is really good looking (and feeling) stuff. I'll set it out in the FL sun for the next few days to see if there are any short-term ill effects. If so, I'll have to go back to the drawing board - or accept that they have to be white.

I'll post my findings as I progress with the project.
 

Attachments

erkme73

BIT Beta Team
Joined
Nov 9, 2014
Messages
1,540
Reaction score
1,412
After three days of testing, I've concluded that the black paint does not substantially increase the temperature of the camera - at least not with 80° ambient temperatures. Though, I did get some pretty awesome/trippy video of the sky...


I imagine I'll hit much more severe conditions in the summer, and in other parts of the country - but for now, this has given me the confidence to proceed with installing them painted black. During the painting of a second one, I screwed up and had some runs in the paint. I let it dry, and peeled it off in one sheet. Pretty cool stuff...
 

ADCS

Young grasshopper
Joined
Aug 31, 2014
Messages
80
Reaction score
9
Location
Toronto
I am curious how you were measuring the temperature of the camera. Case temp? And did you have a white one side by side for comparison? Thanks!
 

erkme73

BIT Beta Team
Joined
Nov 9, 2014
Messages
1,540
Reaction score
1,412
I used a non-contact thermal gun, aimed at the front and side of the ball during the hottest part of the day. The peak temperature was 96° on the black version, and 93° on the white. But, I don't think that tells the whole story. The day peaked at 84°, which is obviously quite lower than the hotter parts of the year.

Also, I had this (black) camera set to push data at 1/4 FPS (1 frame every 4 seconds), where the unpainted was at 15 FPS. I'm sure the higher the frame rate, the higher the temps. So it's really not an apples-to-apples comparison.

I really just wanted to see if the paint caused a dramatic difference in surface temperature, and whether or not the video quality would be effected (short or long term). For now, the answer is no. That may change in the summer.

But, worst case, if it does, I can just peel it off again.

I'll keep this thread updated with findings as I progress into the hot season.
 

icerabbit

Getting the hang of it
Joined
Apr 14, 2014
Messages
583
Reaction score
74
Location
FL <~> ME
Great job on the paint dip.
Thanks for keeping us posted on the findings.

Was that video a series of jpgs stitched together? Or is that some low continuous manual recording?

Note that my sunshade idea would only be a horizontal flap with rounded over edges which frontal area during driving would just be that of like a flat 4x4 fin sticking out sideways out of the vehicle, with hopefully 0.0x drag. But the less stuff you have sticking out, the better visually (whether house, vehicle, boat, ...) :) And if you can get away without shade, that much the better. You could always try out a retrofit one.

It is almost a shame that you don't have a ribbon of that gold tone on the top in that paint scheme. Gold cams! ;)

Anyway. It certainly is encouraging to hear you had that camera out in full sun all day and it kept working. I will keep my eyes open for additional findings you have and/or test you may do.

Sorry to be curious, but I'm still pondering how the physical install will be done and routing of the wires. These vehicles don't come pre-wired (do they?) and have finished walls, floors, ceilings, ... I wouldn't know where to start on an rv/... Can one fish wires up inside the walls? Do you have experience to tackle this yourself, or a family member in the industry? Or you purchased the cam & dvr hardware and will have a dealer do it?
 

erkme73

BIT Beta Team
Joined
Nov 9, 2014
Messages
1,540
Reaction score
1,412
I actually dialed the video output down on the camera GUI itself. Under the video settings, I selected an FPS of 1/4. Then on Blue Iris (V4), I set the camera up to the matching resolution and frame rate (1 frame every 4 seconds). I set the camera's "record" feature in BI to "continuous" (vs. triggered). That resulted in a day-long single BVR file - which I then exported to AVI.

As a final step, I re-rendered it from real time to 90FPS using Avidemux - a free, lightweight video rendering tool (took < 2 min to render). All in, the post took less than 5 min. I was really impressed to see how dynamic a single day's cloud movements are. I never new the clouds blew in 5 different directions all at the same time.


I suppose I'd entertain the idea of a black sun shield over going white. Hopefully I won't have to cross that bridge.

As for the RV wiring - yes, you are correct. While I'm sure in the future these will come with pre-wired ethernet at every corner, currently they do not. The walls are not particularly thick, and they're filled with Styrofoam an other cross members which makes going inside them virtually impossible.

But on the far corners of the coach are, what are known as, end caps. They hold the windshield in the front, and cover the engine compartment in the rear. They're easily accessible from either side - so drilling through these to fish a cat6 cable through, is pretty simple. I'll then pull the cable down the length of the end caps to the undercarriage. From there, I can pull it towards the center of the coach inside the "basement" - and run it up into any one of the existing cable chases that go inside the cabin.

I will put one camera on each corner facing towards the midsection of the coach. Then I'll add one more at the front - dead center - aiming straight ahead (like a dash camera). The last one will be at the back center.

The beauty of this setup, aside from the security benefits of remote monitoring, and seeing what's happening outside from the comfort of my bed, is that all 6 will be recording anytime there is motion - including while driving. That'll provide a 360° 18MP dash camera for times where idiots cut me off, or don't know how to merge. Priceless.
 
Top