Review- New Design Tendelux 10 Watt IR illuminator.

Yeah, I saw one more in stock when I posted above. I ordered it so we'll see if it's another mismarked one. Had no idea there was a V version so I was confused because the product I ordered didn't mention anything about a remote. I'm like WTH...LOL.

The new DI10 arrived today from Amazon. It's the correct DI10 thankfully! I guess the first one was just a one-off packing mistake by the manufacturer. But, you can see from the post above why I wanted to try a DI10 instead of a DI20. I envision the DI20 may be a good IR if mounted maybe 15+ feet off the ground and aimed out in the distance for cams pointing farther down range.
 
  • Like
Reactions: Mike A.
Honestly, the reason I'm buying another DI10 is to replace the DI20 due to exactly what you said. HOT SPOT issue. I've got it pointed way up too. I need to measure the temp of the filter lens on the front to see how hot it gets. Then, if not too bad put some diffusing material on it.

I just measured the temp of that DI20. The surface temp measured on the lens is only 96 degrees therefore that self stick diffusing material I plan to use should be fine and not melt. The DI20 metal enclosure was around 125 degrees so a bit uncomfortable if you want to hold it in your hand.
 
  • Like
Reactions: Mike A.
Glad you got the right one. Curious to see how much difference there is. You've got a better direct comparison that I had. I'm guessing that it's still going to be pretty hot as you have it.
 
  • Like
Reactions: Sybertiger
I want to see if I can improve the night-time image from my OwlCam. I have a sunshade over the top, but the IR bounces off it like crazy, despite my attempts at mitigation. That camera (IPC-HFW4431R-Z) throws a ton of light (it was appropriate suggested to me as an "IR cannon"), so I'm trying to get a similar amount of light, but from a different source. This would also help with the spiders.

LOL! I just checked, and I never checked out, so that DI20 was still in my amazon cart from this morning. Since then it dropped $7 to $45. So I saved $7 by being forgetful. I just ordered, and it should arrive tomorrow.

The 20W DI20 illuminator arrived, as did my $35 POE/DC Power Meter:

1676009418369.png

20 W when it's on,:

1676009450389.png

and << 1 W when it's idle.

I don't have a spare POE camera lying around in the house to test the POE current measurement, but I'll measure a couple of cameras when I go down to the garden to deploy this illuminator.
 
Here's the DI10 in place of the DI20. As predicted you can still see a hot spot even with it pointed up as high as possible. Still waiting on HomeDepot to deliver the window film to see if I can scatter the IR a little better.

1676234245502.png
 
I use a couple of lower powered illuminators side-by-side to spread out the hotspots. Too bad they don't used a slightly curved backplane to mount the LEDs to.
 
If you can mount these pointed out vs down with the 'U' cut-out for the ball post facing up, then that will give you more range to angle them up. I did that with one of mine that's mounted closer to the ground. It's probably at a 30 degree angle to the ground and still plenty of light.
 
  • Like
Reactions: looney2ns
I am using one of the "new" generation DI10 IR units and have no complaints on the pattern or spread in my setup.

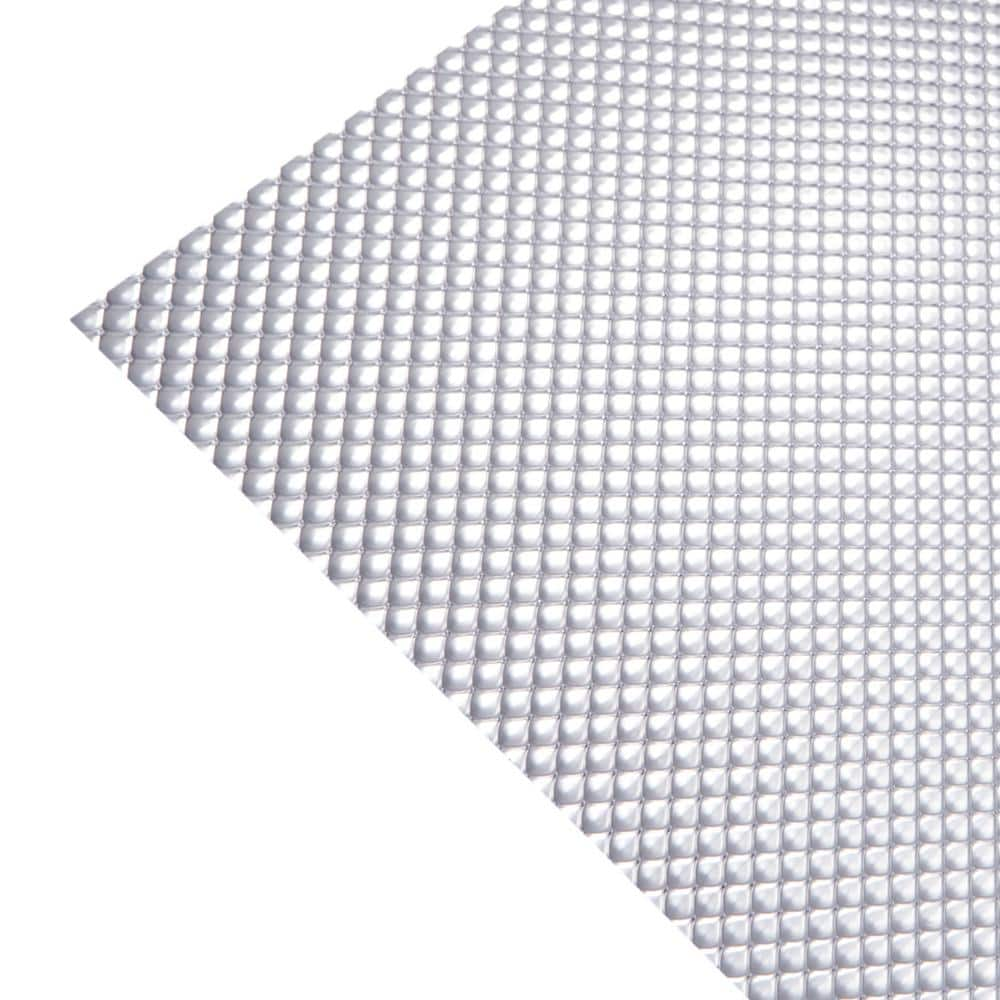
However, if so inclined, the first thing I would try is bonding a piece of acrylic (not the cheap styrene version that will quickly yellow with UV exposure) clear P12 lighting diffuser cut to the same size as the face of the unit. Most people will recognize this as the most common "prismatic" textured clear diffuser used under many, many florescent light fixtures. You will want to bond this with the smooth side facing the original IR lens face, and the textured side facing out. This material is expressly designed for light diffusion....just saying.
I looked for P12 lighting diffuser on Amazon and couldn't find it. I'd like to try it, do you have a link to a source to purchase some? Thanks
 
I looked for P12 lighting diffuser on Amazon and couldn't find it. I'd like to try it, do you have a link to a source to purchase some? Thanks
If you are nearby a (mostly SF Bay Area based) TAP Plastics, they will sell you a small piece, cut to size (unfortunately their website doesn't show it as available to purchase online).

Otherwise, most Home Depots carry it, see here, but you will be buying a roughly 2' x 4' piece and will have enough to make about 50 of the size you need.

Is this the crystal-like stuff that cracks if you look at it funny?
 
Is this the crystal-like stuff that cracks if you look at it funny?
Close, but the one your are referring to is generally called a "cracked ice" pattern, also available in clear and white varieties (as is the P12 prismatic), and various grades (you will always want the acrylic ones, never styrene if you care how long they last before yellowing from UV).

The key to cutting any of these well is the right kind of circular saw blade: generally, it should be what is called a "triple-chip" design, the same thing that is used for cutting thin aluminum sheets. In a pinch, a fresh, sharp plywood blade can also be used. Never let people talk you into running a circular saw blade installed backwards, it will just melt it's way through the material (at best).

Router bits also work fantastic to cut this material, and can be used for template routing:making multiple copies of a pattern/shape by temporarily adhering (with double-sided tape) the material to a thicker wood/masonite/plastic template and copying the shape with a router bit that has a bearing attached.
 
I went ahead and ordered a 120 for shits and giggles. It puts out a 100% more coverage then the older IR 18W tendelux I had. I am impressed and mine doesnt seem to be getting hot at all, Ill check again before morning. I do have it mounted at the edge of the underhang of the house. I have it tilted up far as I can. I am getting well over 150' ft in throw and 120 plus on width. I will be moving it to the top of the cutter in coming days and tilting it even more. And as many here have said that goddamn mount is a pain in the ASS.

I ordered the 120 and a couple d14 thinking I would use a splitter and run one power cord and use just one eletrical socket . Nope that would have been to damn easy. As usual with the Chinese you cant win no matter what with them. The damn ends on the ir things are different!!! SO either i have to cut and splice on the right end to get it to work with the splitter, find a adapter or just run 2 power cords.

Alsoo the invisible claim is total BS. I can clearly see mine from 100ft clear as day. SO why they cliam it cant be seen past 5ft who knows. Hell the older model I ordered is less visible then the 120.
 
I didn't see the invisible claim but, yeah, no way. You can see them a longggg way away.

If you don't want to use that mount, the DI10 uses a standard 1/4" threaded post. I'd guess that the DI20 does too. I put one of mine on a little bracket that's made to gutter mount the Ring/Blink/Wyze/etc. cams. Used that same mount for another that I clamped to a small tree branch.
 
If you don't want to use that mount, the DI10 uses a standard 1/4" threaded post. I'd guess that the DI20 does too. I put one of mine on a little bracket that's made to gutter mount the Ring/Blink/Wyze/etc. cams. Used that same mount for another that I clamped to a small tree branch.
Ah, good tip! Yes, my DI120 appears to have a 1/4"/20 threaded hole.

Do you have a link for that bracket you're using? The Tendelex mount truly sucks donkey balls.
 
The ones that I got I picked up at Microcenter on clearance real cheap. I think they're Wasserstein. Looks like Amazon has them:

These look close to the same thing for a few bucks less:

Some others if you search for camera gutter mount. Not much to them.

Lots of other 1/4" mounts that you can find for various uses, e.g.:
 
As an Amazon Associate IPCamTalk earns from qualifying purchases.
  • Like
Reactions: TheWaterbug
Guys a simple metal screw will work with the donkey balls mount they provide. Well if you have a lip like i do on the cutter. A 2 pack of 1/2 metal screws at lowes is less then a dollar. 1 screw will hold but you can line up 2 if you try. Doesnt take much to hold this stuff the chinese way over engineer some things and half ass others. I never use all the stuff they send. Two screws easily holds the camera up.

From what I an see the higher you point this light the better coverage you get. I just felt mine again its been burning like 7 hrs and it is warm at most not hot at all. They must have fixed the hot issue.
 
Well, this is disappointing and surprising. I put frosted window film on the DI10 hoping it would scatter the IR a little better. I can't say that I see much difference with or without the film on it. Still a huge hotspot on the ground despite it being aimed upward as best as it can be.


NO Window Film on Lens
Without.JPG

WITH Window Film on Lens
With.JPG
 
  • Sad
Reactions: Mike A.