Very happy to say, my NVR is fully functional again, thanks to
jftech.com support. I owe them, so grateful. They sent me the needed update.img file, which I copied over to my NVR by
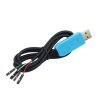
TFTP, running command "run up" from serial console and having the update file inside the same directory as TFTP server on my windows pc.
It did it in under 5minutes thankfully before the NVR would automatically reboot.
So I'm very thankful to alastairstevenson guiding me as well, when no one else could or would.
Thank you!
I tried to upload file here, but it would fail, I guess it's too big.
If anyone needs it, let me know, I'll gladly share it.
All my settings like cameras/password were all retained, didn't lose anything.
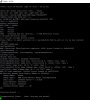
The serial output from the flash:
Code:
U-Boot 2010.06-svn201 (Dec 05 2014 - 13:49:36)

Check spi flash controller v350... Found
Spi(cs1) ID: 0xC2 0x20 0x18 0xC2 0x20 0x18
Spi(cs1): Block:64KB Chip:16MB Name:"MX25L128XX"
In:    serial
Out:   serial
Err:   serial
USB:   scanning bus for devices... 1 USB Device(s) found
0 Storage Device(s) found
PHY 0x02: OUI = 0x1374, Model = 0x07, Rev = 0x02
change register for AR8035
CONFIG RGMII
MAC:   00-0B-3F-00-00-01
Press CTRL-C to abort autoboot in 0 secondshisilicon # printenv
bootcmd=sf probe 0;sf read 84000000 f20000 20000;logoload 0x84000000;decjpg;sf read 84000000 50000 4A0000;fload 84000000;bootm 0x82000000
bootdelay=1
baudrate=115200
bootfile="uImage"
restore=1
da=mw.b 0x82000000 ff 1000000;tftp 0x82000000 u-boot.bin.img;sf probe 0;flwrite
du=mw.b 0x82000000 ff 1000000;tftp 0x82000000 user-x.cramfs.img;sf probe 0;flwrite
dr=mw.b 0x82000000 ff 1000000;tftp 0x82000000 romfs-x.cramfs.img;sf probe 0;flwrite
dw=mw.b 0x82000000 ff 1000000;tftp 0x82000000 web-x.cramfs.img;sf probe 0;flwrite
dl=mw.b 0x82000000 ff 1000000;tftp 0x82000000 logo-x.cramfs.img;sf probe 0;flwrite
dc=mw.b 0x82000000 ff 1000000;tftp 0x82000000 custom-x.cramfs.img;sf probe 0;flwrite
up=mw.b 0x82000000 ff 1000000;tftp 0x82000000 update.img;sf probe 0;flwrite
tk=mw.b 0x82000000 ff 1000000;tftp 0x82000000 zImage.img; bootm 0x82000000
dd=mw.b 0x82000000 ff 1000000;tftp 0x82000000 mtd-x.jffs2.img;sf probe 0;flwrite
ipaddr=192.168.1.10
serverip=192.168.1.1
netmask=255.255.255.0
gatewayip=192.168.0.1
ethaddr=00:0b:3f:00:00:01
bootargs=mem=180M console=ttyAMA0,115200 root=/dev/mtdblock1 rootfstype=cramfs mtdparts=hi_sfc:320K(boot),4736K(romfs),5824K(usr),1536K(web),3072K(custom),128K(logo),768K(mtd)
appSystemLanguage=English
appVideoStandard=NTSC
stdin=serial
stdout=serial
stderr=serial
verify=n
ver=U-Boot 2010.06-svn201 (Dec 05 2014 - 13:49:36)

Environment size: 1359/65532 bytes
hisilicon # run up
miiphy_register: non unique device name '0:2'
PHY 0x02: OUI = 0x1374, Model = 0x07, Rev = 0x02
change register for AR8035
CONFIG RGMII
MAC:   00-0B-3F-00-00-01
TFTP from server 192.168.1.1; our IP address is 192.168.1.10
Download Filename 'update.img'.
Download to address: 0x82000000
Downloading: #################################################
done
Bytes transferred = 12652928 (c11180 hex)
16384 KiB hi_sfc at 0:0 is now current device
PACK_ID OK

## Checking Image at 0x82000040 ...
   Header CRC Checking ... OK
   Image Name:   linux
   Image Type:   ARM Linux Standalone Program (gzip compressed)
   Data Size:    2920448 Bytes = 2.8 MiB
   Load Address: 00c20000
   Entry Point:  00f20000
   Data CRC Checking ... OK
Programing start at: 0x00c20000
Programing end at: 0x00f20000
Erasing at 0xf20000 -- 100% complete.
done.
Erased sectors.
Saving Image to Flash ...
Writing at 0xf20000 -- 100% complete.
done.
PACK_ID OK

## Checking Image at 0x822c9080 ...
   Header CRC Checking ... OK
   Image Name:   linux
   Image Type:   ARM Linux Standalone Program (gzip compressed)
   Data Size:    20480 Bytes = 20 KiB
   Load Address: 00f20000
   Entry Point:  00f40000
   Data CRC Checking ... OK
Programing start at: 0x00f20000
Programing end at: 0x00f40000
Erasing at 0xf40000 -- 100% complete.
done.
Erased sectors.
Saving Image to Flash ...
Writing at 0xf40000 -- 100% complete.
done.
PACK_ID OK

## Checking Image at 0x822ce0c0 ...
   Header CRC Checking ... OK
   Image Name:   linux
   Image Type:   ARM Linux Kernel Image (gzip compressed)
   Data Size:    3989504 Bytes = 3.8 MiB
   Load Address: 00050000
   Entry Point:  004f0000
   Data CRC Checking ... OK
Programing start at: 0x00050000
Programing end at: 0x004f0000
Erasing at 0x4f0000 -- 100% complete.
done.
Erased sectors.
Saving Image to Flash ...
Writing at 0x4f0000 -- 100% complete.
done.
PACK_ID OK

## Checking Image at 0x8269c100 ...
   Header CRC Checking ... OK
   Image Name:   linux
   Image Type:   ARM Linux Kernel Image (gzip compressed)
   Data Size:    4411392 Bytes = 4.2 MiB
   Load Address: 004f0000
   Entry Point:  00aa0000
   Data CRC Checking ... OK
Programing start at: 0x004f0000
Programing end at: 0x00aa0000
Erasing at 0xaa0000 -- 100% complete.
done.
Erased sectors.
Saving Image to Flash ...
Writing at 0xaa0000 -- 100% complete.
done.
PACK_ID OK

## Checking Image at 0x82ad1140 ...
   Header CRC Checking ... OK
   Image Name:   linux
   Image Type:   ARM Linux Standalone Program (gzip compressed)
   Data Size:    1310720 Bytes = 1.3 MiB
   Load Address: 00aa0000
   Entry Point:  00c20000
   Data CRC Checking ... OK
Programing start at: 0x00aa0000
Programing end at: 0x00c20000
Erasing at 0xc20000 -- 100% complete.
done.
Erased sectors.
Saving Image to Flash ...
Writing at 0xc20000 -- 100% complete.
done.
hisilicon # reset
resetting ...
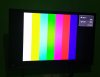
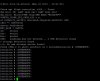
A fresh start, with the NVR starting up correctly:
Code:
U-Boot 2010.06-svn201 (Dec 05 2014 - 13:49:36)

Check spi flash controller v350... Found
Spi(cs1) ID: 0xC2 0x20 0x18 0xC2 0x20 0x18
Spi(cs1): Block:64KB Chip:16MB Name:"MX25L128XX"
In:    serial
Out:   serial
Err:   serial
USB:   scanning bus for devices... 1 USB Device(s) found
0 Storage Device(s) found
PHY 0x02: OUI = 0x1374, Model = 0x07, Rev = 0x02
change register for AR8035
CONFIG RGMII
MAC:   00-0B-3F-00-00-01
Press CTRL-C to abort autoboot in 0 seconds16384 KiB hi_sfc at 0:0 is now current device

CFG_BOOT_ADDR:0x0
### /UbootLogo UbootLogoload complete: 21986 bytes loaded to 0x88200000
jpeg decoding ...
<<addr=0x88200000, size=0xb85f9, vobuf=0x88200000>>
<<imgwidth=800, imgheight=600, linebytes=1600>>
decode success!!!!
decode jpeg success.
decode jpeg!

CFG_BOOT_ADDR:0x58050000
### boot load complete: 2808640 bytes loaded to 0x82000000
### SAVE TO 80008000 !
## Booting kernel from Legacy Image at 82000000 ...
   Image Name:   linux
   Image Type:   ARM Linux Kernel Image (uncompressed)
   Data Size:    2808576 Bytes = 2.7 MiB
   Load Address: 80008000
   Entry Point:  80008000
   Loading Kernel Image ... OK
OK

Starting kernel ...

Uncompressing Linux... done, booting the kernel.

")