Help setting up my dahua cameras

Joined
Mar 1, 2020
Messages
7
Reaction score
5
Location
Calgary, Alberta, Canada
Hello,

I was wondering if it is acceptable to request help configuring my dahua cameras on here. I am not very good at the camera world and the "installer" who sold me the hardware has since tripled his "configuration" pricing and won't help me further. I have come to learn that he has a reputation in the city as unreliable and takes advantage of people.

Essentially I have 2 N45DL7Z, one DB11 doorbell and a IPC-L26N. They are all on my 10.0.0.x subnet and I upgraded all the firmwares.

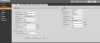
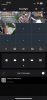
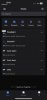
I need to get them optimized to record onto the SD cards, get the alarming/quality settings correct and then I need to figure out how to get it working in the app. I hope there isn't too much more to do here

Again, sorry if the post isn't allowed but I am at my wits end trying to configure and optimize this system to work after spending a lot of money and I'm in a bit of a pickle.

Thanks!
 

wittaj

IPCT Contributor
Joined
Apr 28, 2019
Messages
25,129
Reaction score
48,988
Location
USA
Yeah, we here call "installers" trunk slammers because the majority of them simply run the wires, hang up the cameras and call it good.

Very few will price or offer "dialing the settings" in to your field of view.

Do you just have cameras or an NVR as well?

If no NVR, you will find that after about 2 cameras, you will really want some sort of VMS system to manage the cameras.
 
Joined
Mar 1, 2020
Messages
7
Reaction score
5
Location
Calgary, Alberta, Canada
Hey, thanks for the reply - it's true, I feel like I've been taken advantage of while trying to buy a "high quality" camera. Would have been way easier to go with Ubiquiti Protect to match my network system, but I wanted to get good quality. Anyways...

No nvr, just SD cards installed in each camera. The goal was to record locally and retrieve it if necessary.
 

wittaj

IPCT Contributor
Joined
Apr 28, 2019
Messages
25,129
Reaction score
48,988
Location
USA
If you have already been in the camera GUI and updated firmware and stuff, you can figure this out!

Generally you go into a Dahua camera and set up Smart Plan and IVS and then draw the IVS rule (intrusion or tripwire) and check the record box and put in how long you want it to record when triggered.
 
Joined
Mar 1, 2020
Messages
7
Reaction score
5
Location
Calgary, Alberta, Canada
If you have already been in the camera GUI and updated firmware and stuff, you can figure this out!

Generally you go into a Dahua camera and set up Smart Plan and IVS and then draw the IVS rule (intrusion or tripwire) and check the record box and put in how long you want it to record when triggered.
Ha thanks for the words of encouragement. I guess what I'm getting at is that I don't have the knowledge needed to pick day/night settings and all that jazz
 

wittaj

IPCT Contributor
Joined
Apr 28, 2019
Messages
25,129
Reaction score
48,988
Location
USA
You can do this!

In terms of getting the most out of the camera, here is my "standard" post that many use as a start for dialing in day and night that helps get the clean captures. You need to get off of default. These are done within the camera GUI thru a web browser.

Start with:

H264
8192 bitrate
CBR
15FPS
15 iframes

Every field of view is different, but I have found you need contrast to usually be 6-8 higher than the brightness number at night.

We want the ability to freeze frame capture a clean image from the video at night, and that is only done with a shutter of 1/60 or faster. At night, default/auto may be on 1/12s shutter or worse to make the image bright.

In my opinion, shutter (exposure) and gain are the two most important parameters and then base the others off of it. Shutter is more important than FPS. It is the shutter speed that prevents motion blur, not FPS. 15 FPS is more than enough for surveillance cameras as we are not producing Hollywood movies. Match iframes to FPS. 15FPS is all that is usually needed.

Many people do not realize there is manual shutter that lets you adjust shutter and gain and a shutter priority that only lets you adjust shutter speed but not gain. The higher the gain, the bigger the noise and see-through ghosting start to appear because the noise is amplified. Most people select shutter priority and run a faster shutter than they should because it is likely being done at 100 gain, so it is actually defeating their purpose of a faster shutter.

Go into shutter settings and change to manual shutter and start with custom shutter as ms and change to 0-8.3ms and gain 0-50 (night) and 0-4ms exposure and 0-30 gain (day)for starters. Auto could have a shutter speed of 100ms or more with a gain at 100 and shutter priority could result in gain up at 100 which will contribute to significant ghosting and that blinding white you will get from the infrared or white light.

Now what you will notice immediately at night is that your image gets A LOT darker. That faster the shutter, the more light that is needed. But it is a balance. The nice bright night static image results in Casper blur and ghost during motion LOL. What do we want, a nice static image or a clean image when there is motion introduced to the scene?

In the daytime, if it is still too bright, then drop the 4ms down to 3ms then 2ms, etc. You have to play with it for your field of view.

Then at night, if it is too dark, then start adding ms to the time. Go to 10ms, 12ms, etc. until you find what you feel is acceptable as an image. Then have someone walk around and see if you can get a clean shot. Try not to go above 16.67ms (but certainly not above 30ms) as that tends to be the point where blur starts to occur. Conversely, if it is still bright, then drop down in time to get a faster shutter.

You can also adjust brightness and contrast to improve the image.

You can also add some gain to brighten the image - but the higher the gain, the more ghosting you get. Some cameras can go to 70 or so before it is an issue and some can't go over 50.

But adjusting those two settings will have the biggest impact. The next one is noise reduction. Want to keep that as low as possible. Depending on the amount of light you have, you might be able to get down to 40 or so at night (again camera dependent) and 20-30 during the day, but take it as low as you can before it gets too noisy. Again this one is a balance as well. Too smooth and no noise can result in soft images and contribute to blur.

Do not use backlight features until you have exhausted every other parameter setting. And if you do have to use backlight, take it down as low as possible.

After every setting adjustment, have someone walk around outside and see if you can freeze-frame to get a clean image. If not, keep changing until you do. Clean motion pictures are what we are after, not a clean static image.
 
Joined
Mar 1, 2020
Messages
7
Reaction score
5
Location
Calgary, Alberta, Canada
You can do this!

In terms of getting the most out of the camera, here is my "standard" post that many use as a start for dialing in day and night that helps get the clean captures. You need to get off of default. These are done within the camera GUI thru a web browser.

Start with:

H264
8192 bitrate
CBR
15FPS
15 iframes

Every field of view is different, but I have found you need contrast to usually be 6-8 higher than the brightness number at night.

We want the ability to freeze frame capture a clean image from the video at night, and that is only done with a shutter of 1/60 or faster. At night, default/auto may be on 1/12s shutter or worse to make the image bright.

In my opinion, shutter (exposure) and gain are the two most important parameters and then base the others off of it. Shutter is more important than FPS. It is the shutter speed that prevents motion blur, not FPS. 15 FPS is more than enough for surveillance cameras as we are not producing Hollywood movies. Match iframes to FPS. 15FPS is all that is usually needed.

Many people do not realize there is manual shutter that lets you adjust shutter and gain and a shutter priority that only lets you adjust shutter speed but not gain. The higher the gain, the bigger the noise and see-through ghosting start to appear because the noise is amplified. Most people select shutter priority and run a faster shutter than they should because it is likely being done at 100 gain, so it is actually defeating their purpose of a faster shutter.

Go into shutter settings and change to manual shutter and start with custom shutter as ms and change to 0-8.3ms and gain 0-50 (night) and 0-4ms exposure and 0-30 gain (day)for starters. Auto could have a shutter speed of 100ms or more with a gain at 100 and shutter priority could result in gain up at 100 which will contribute to significant ghosting and that blinding white you will get from the infrared or white light.

Now what you will notice immediately at night is that your image gets A LOT darker. That faster the shutter, the more light that is needed. But it is a balance. The nice bright night static image results in Casper blur and ghost during motion LOL. What do we want, a nice static image or a clean image when there is motion introduced to the scene?

In the daytime, if it is still too bright, then drop the 4ms down to 3ms then 2ms, etc. You have to play with it for your field of view.

Then at night, if it is too dark, then start adding ms to the time. Go to 10ms, 12ms, etc. until you find what you feel is acceptable as an image. Then have someone walk around and see if you can get a clean shot. Try not to go above 16.67ms (but certainly not above 30ms) as that tends to be the point where blur starts to occur. Conversely, if it is still bright, then drop down in time to get a faster shutter.

You can also adjust brightness and contrast to improve the image.

You can also add some gain to brighten the image - but the higher the gain, the more ghosting you get. Some cameras can go to 70 or so before it is an issue and some can't go over 50.

But adjusting those two settings will have the biggest impact. The next one is noise reduction. Want to keep that as low as possible. Depending on the amount of light you have, you might be able to get down to 40 or so at night (again camera dependent) and 20-30 during the day, but take it as low as you can before it gets too noisy. Again this one is a balance as well. Too smooth and no noise can result in soft images and contribute to blur.

Do not use backlight features until you have exhausted every other parameter setting. And if you do have to use backlight, take it down as low as possible.

After every setting adjustment, have someone walk around outside and see if you can freeze-frame to get a clean image. If not, keep changing until you do. Clean motion pictures are what we are after, not a clean static image.
dang! there's a lot there to unpack! I will review your reply tonight and take a crack at it. Do I need to do anything to make it record to the Sd card all the time? ideally over writing when too full? Also, is 15 fps good enough or do I want 30? I originally wanted 60 but maybe I am looking at it wrong
 
Joined
Mar 1, 2020
Messages
7
Reaction score
5
Location
Calgary, Alberta, Canada
dang! there's a lot there to unpack! I will review your reply tonight and take a crack at it. Do I need to do anything to make it record to the Sd card all the time? ideally over writing when too full? Also, is 15 fps good enough or do I want 30? I originally wanted 60 but maybe I am looking at it wrong
oh yeah, I don't want h265? I thought that was the best?
 

wittaj

IPCT Contributor
Joined
Apr 28, 2019
Messages
25,129
Reaction score
48,988
Location
USA
You do not want it recording continuous as it will write over every day or so (depending on the size of the card), plus many of us have seen issues when recording to SD cards continuously, so most of us record to SD card on triggers.

15FPS is more than sufficient.

These types of cameras are not GoPro or Hollywood type cameras that offer slow-mo capabilities and other features. They "offer" 30FPS and 60FPS to appease the general public that thinks that is what they need, but you will not find many of us here running more than 15 FPS; and movies are shot at 24 FPS, so anything above that is a waste of storage space for what these cameras are used for. If 24 FPS works for the big screen, I think 15 FPS is more than enough for phones and tablets and most monitors LOL. Many of my cameras are running at 12FPS.

Sure 30 or 60FPS can provide a smoother video but no police officer has said "wow that person really is running smooth". They want the ability to freeze frame and get a clean image. So be it if the video is a little choppy....and at 10-15FPS it won't be appreciable. My neighbor runs his at 60FPS, so the person or car goes by looking smooth, but it is a blur when trying to freeze frame it because the camera can't keep up with his other settings.. Meanwhile my camera at 15FPS with the proper shutter speed gets the clean shots.

Watch these, for most of us, it isn't annoying until below 10FPS


wittaj

IPCT Contributor
Joined
Apr 28, 2019
Messages
25,129
Reaction score
48,988
Location
USA
This will explain H264 versus H265 a little better.

H265 in theory provides more storage as it compresses differently, but part of that compression means it macro blocks big areas of the image that it thinks isn't moving. However, it also takes more processing power of the already small CPU in the camera and that can be problematic if someone is maxing out the camera in other areas like FPS and then it stutters.

In theory it is supposed to need 30% less storage than H264, but most of us have found it isn't that much. My savings were less than few minutes per day. And to my eye and others that I showed clips to and just said do you like video 1 or video 2 better, everyone thought the H264 provided a better image.

The left image is H264, so all the blocks are the same size corresponding to the resolution of the camera. H265 takes areas that it doesn't think has motion and makes them into bigger blocks and in doing so lessens the resolution yet increases the camera CPU demand to develop these larger blocks.

In theory H265 is supposed to need half the bitrate because of the macroblocking. But if there is a lot of motion in the image, then it becomes a pixelated mess. The only way to get around that is a higher bitrate. But if you need to run the same bitrate for H265 as you do H264, then the storage savings is zero. Storage is computed based on multiplying bitrate, FPS, and resolution.


1667974399793.png


In my testing I have one camera that sees a parked car in front of my house. H265 sees that the car isn't moving, so it macroblocks the whole car and surrounding area. Then the car owner walked up to the car and got in and the motion is missed because of the macroblock being so large. Or if it catches it, because the bitrate is low, it is a pixelated mess during the critical capture point and by the time H265 adjusts to there is now motion, the ideal capture is missed.

In my case, the car is clear and defined in H264, but is blurry and soft edges in H265.

Digital zooming is never really good and not something we recommend, but you stand a better chance of some digital zoom with H264 rather than a large macroblocked H265. I can digital zoom on my overview camera and kinda make out the address number of the house across the street with H264, but not a chance with H265 as it macroblocked his whole house.

H265 is one of those theory things that sounds good, but reality use is much different.

Some people have a field of view or goals that allow H265 to be sufficient for their needs.

As always, YMMV.
 

mat200

IPCT Contributor
Joined
Jan 17, 2017
Messages
14,004
Reaction score
23,335
FYI - 15fps is good for anyone walking / running and cars moving at normal speeds in neighborhood.

30 fps is what I would use for video to share on youtube and the like, and faster roads ..
 
Joined
Mar 1, 2020
Messages
7
Reaction score
5
Location
Calgary, Alberta, Canada
I'm slowly getting the image dialled in, as per the instructions above. still need to figure out the event stuff and how to trigger things without using too much memory - but one thing I noticed is that I can only see the cameras if I'm on my local wifi and I also can't seem to add the doorbell to the live view button. Is there anything obvious standing out in the pictures below that I'm missing?
 

Attachments

Top