Long Time Listener, First Time Caller - Dahua/Empire 4k Color Cams

That is getting there - still a bit of noise, but could certainly obtain a good capture.

I would suggest to test it under that scenario and see what it looks like with the door up to simulate the situation - does the outside introduce any ambient light to improve the image or does it create a backlight situation that shadows the perp, etc.

I would then consider a motion trigger very close to the entrance of the garage so that someone doesn't have to go far for the lights to kick on.
 
  • Like
Reactions: JDreaming
Judging from yor 1st vidoe in post #38, I'd say the 1st place you could identify yourself from would be the 2nd Candy Cane from the porch. That's maybe 10-12 feet? Definately not 40!
 
  • Like
Reactions: Kevin Doe
I did some night time testing. The image quality at night from my driveway cam was not to my liking, so I made an effort to increase the ambient lighting.

Left to right. 2x 800 lumens (60w equivalent), 2x 1600 lumens (100w equivalent), 2x 2605 lumens (150w equivalent).

1639611868873.png


Then zooming in (via cropping and enlarging in PowerPoint)
1639611917283.png

My thoughts:
  • Each increase in light came with a noticeable improvement in image quality.
  • My facial features are still pretty muddled and unclear. That may mostly be an artifact of having a 2.8mm focal length where a 3.6mm or higher may be necessary.
  • Background appears darker as more light is available in the foreground. This is probably ok, since I care more about what's going on in my driveway than in the street.
  • 2x 2605 lumens (150w equivalents) is pretty bright. Certainly can't go brighter without looking weird in the neighborhood. The 2x 150w may already be pushing it.
 
Additional lighting is always recommended although to be fair you shouldn't need to go too crazy, depends on location, ambient light, target requirements etc of course. I would still definitely recommend adjusting height (lower) and angle (angle up as you reduce height) based on what I see in this image for a more optimal FOV. Responded to your DM. When you get chance take a look and we can set some time up if you like. That way I can also look to dial in and we can see if we can improve your overall pic at each light level. For reference some of the noise you're seeing in pic 1 (farthest left) is due to the AGC bumping due to the lower light levels . Other cam settings can be tweaked a little to assist even in more challenging lighting situations. This is also why with more front and center off cam lighting you are also then seeing AGC 'calm down' when more light is on scene.

HTH, ping me back if you want me to take a look
I did some night time testing. The image quality at night from my driveway cam was not to my liking, so I made an effort to increase the ambient lighting.

Left to right. 2x 800 lumens (60w equivalent), 2x 1600 lumens (100w equivalent), 2x 2605 lumens (150w equivalent).

View attachment 112215


Then zooming in (via cropping and enlarging in PowerPoint)
View attachment 112216

My thoughts:
  • Each increase in light came with a noticeable improvement in image quality.
  • My facial features are still pretty muddled and unclear. That may mostly be an artifact of having a 2.8mm focal length where a 3.6mm or higher may be necessary.
  • Background appears darker as more light is available in the foreground. This is probably ok, since I care more about what's going on in my driveway than in the street.
  • 2x 2605 lumens (150w equivalents) is pretty bright. Certainly can't go brighter without looking weird in the neighborhood. The 2x 150w may already be pushing it.
 
I went back thru this thread and didn't see that you posted what you were running for nighttime parameters, but if you are running the daytime parameters, you can certainly brighten it up with some minor tweaks.

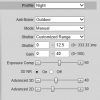
Go into shutter settings and change to manual shutter and start with custom shutter as ms and change to 0-8.3ms and gain 0-50 (night) and 0-30 (day)for starters.

If it is too dark, then start adding ms to the time. Go to 10ms, 12ms, etc. until you find what you feel is acceptable as an image. Then have someone walk around and see if you can get a clean shot. Try not to go above 16.67ms (but certainly not above 30ms) as that tends to be the point where blur starts to occur. Conversely, if it is still bright, then drop down in time to get a faster shutter.

You can also adjust brightness and contrast to improve the image.

You can also add some gain to brighten the image - but the higher the gain, the more ghosting you get. Some cameras can go to 70 or so before it is an issue and some can't go over 50.

But adjusting those two settings will have the biggest impact. The next one is noise reduction. Want to keep that as low as possible. Depending on the amount of light you have, you might be able to get down to 40 or so at night (again camera dependent) and 20-30 during the day, but take it as low as you can before it gets too noisy. Again this one is a balance as well. Too smooth and no noise can result in soft images and contribute to blur.

Do not use backlight features until you have exhausted every other parameter setting. And if you do have to use backlight, take it down as low as possible.

After every setting adjustment, have someone walk around outside and see if you can freeze-frame to get a clean image. If not, keep changing until you do. Clean motion pictures are what we are after, not a clean static image.
 
Additional lighting is always recommended although to be fair you shouldn't need to go too crazy, depends on location, ambient light, target requirements etc of course. I would still definitely recommend adjusting height (lower) and angle (angle up as you reduce height) based on what I see in this image for a more optimal FOV. Responded to your DM. When you get chance take a look and we can set some time up if you like. That way I can also look to dial in and we can see if we can improve your overall pic at each light level. For reference some of the noise you're seeing in pic 1 (farthest left) is due to the AGC bumping due to the lower light levels . Other cam settings can be tweaked a little to assist even in more challenging lighting situations. This is also why with more front and center off cam lighting you are also then seeing AGC 'calm down' when more light is on scene.

HTH, ping me back if you want me to take a look

Great explanation. That's exactly what I thought was going on. Sort of like setting an auto ISO (with a max) in my DSLR. I often shoot football games with fixed aperture and shutter, and let me camera go auto ISO to get the exposure right, up to a maximum ISO that I don't want to go above due to noise characteristics. What I don't fully understand is the algorithm that the cameras use to get the right exposure. When you have a range of shutter and gain, which one has priority to minimize? Or is there some sort of balancing algorithms? I will def ping you back, just finished with dinner.
 
I went back thru this thread and didn't see that you posted what you were running for nighttime parameters, but if you are running the daytime parameters, you can certainly brighten it up with some minor tweaks.

I did some testing a few nights ago to work to improve images at night. Here are my settings for the driveway camera (determined prior to changing to brighter ambient lights). I ended up finding that at night I could go as long as 12.5ms without motion blur. Any longer and I would start to get motion blur. Any shorter and I had to increase gain, which resulted in a lot more noise. It seems that the gain is very sensitive. I noticed that on these cameras that there is what seems like a threshold, and when crossed the noise gets noticeably worse. Not progressively, but for example, a gain of 39 looks pretty good, and 40 drastically changes. Seems that value where the change occurs is dependent on the available lighting.

1639618338936.png 1639618306235.png
 
Continual improvement, this stuff is fun.

I was unhappy about the lens flare I was getting on the porch cam at night, so I fashioned up temporary piece of paper to see if I could improve upon it, without interfering with the video frame.
1639802196529.png1639802220480.png

Here is my paper hood, it extends 1.5-2" beyond the standard hood. No interference with FOV.
D081B8F9-180A-4F99-91F1-1219489B1BE3.jpeg

Does anyone know if Dahua sells a longer hood for these cameras?
 
It is great to see you caught the bug and can join us lunatics LOL. You will be glad you opted for the larger NVR!

That really improved the clarity out to the street. I am sure if painted black it would improve it a little more.

I have not seen Dahua sell longer ones. My neighbor used some aluminum trim leftover when he redid his siding and extended his that way. If you don't have any, I am sure the local Lowe's or Home Depot has a roll or some flat stock.
 
I've found the slats from a vertical blind for a sliding door make really good shades for both bullet and turret cameras. Just trim the length to whatever you need, the width is a pretty good fit on either.
 
Last edited:
Continual improvement, this stuff is fun.

I was unhappy about the lens flare I was getting on the porch cam at night, so I fashioned up temporary piece of paper to see if I could improve upon it, without interfering with the video frame.
View attachment 112564View attachment 112565

Here is my paper hood, it extends 1.5-2" beyond the standard hood. No interference with FOV.
View attachment 112567

Does anyone know if Dahua sells a longer hood for these cameras?
Nothing a 3d printer couldn't solve.
 
Or take the bulb covering down, and spray that section with a flat black etc. It would still let light through, but less and might resolve some of the flaring.
 
  • Like
Reactions: sebastiantombs
How would you guys deal with this type of lighting situation, where you have a very bright area lit by direct sunlight, and a shaded area? The area of focus for this camera is the front porch, in the shaded area. I already increased the exposure settings to a bit on the + side of things, to overexpose the driveway, and get a slightly brighter porch. Is this a situation where WRD would be a good idea?

1643644491380.png
 
Yep, after you have tried everything else, some backlight options like WDR is sometimes needed. Run it is as low as you can go to minimize blur during motion and other artifacts.

That still isn't too bad though - I would probably leave alone if that is as worse it gets as there will be times the sun isn't providing that coverage, then you have WDR impacting a normally lit scene.