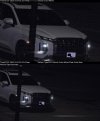
Thank you all for getting me at a baseline of where to start. I have a B52IR-Z12E-S2 from Andy. I'm quite impressed with some of the images here with some of the settings I tried to replicate. My street is pretty dark, so I'm heavily reliant on IR and have an additional IR beam mounted directly underneath the Z12. I am running 30FPS with iframes at 30 as well. I attempted lower values but they were actually worse.
Where I'm having problems is that moving vehicles, even at a 1/4000 or 1/2000 shutter, moving vehicles can still have blurry plates.
What I'm fighting is that a sharpness value too low (like the 10 that was mentioned) also contributes to making things unreadable, even though the plate might be stationary. It's like having a super soft focus that you can't fix.
Playing with NR (erroring on the lower side) introduces a lot of "static" on the image that can also be a detriment to readability, whereas a level 50 is almost no noise on both 2d and 3d, but a detriment to motion readability. I have these set at 35 for 3d, 25 for 2d.
Gain is set to 20-70. More than 70 can introduce way more noise than I'd like. I've been playing with Iris. I believe this photo was at iris 60 with a 1/4000 shutter. From my understanding lower iris numbers are a higher F stop (more things are in focus, like F22 for camera folks, but less light overall) and higher iris numbers are lower F stop numbers that have a narrow depth of field but more light (making you really have to fine tune the area in question).
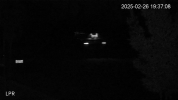
Do i need to Zoom in more? I was trying to allow for vehicles traveling in either direction, but also giving enough space to trigger motion correctly. To the left of this image is a wall, so the tree on the right can't really be avoided without cropping in.
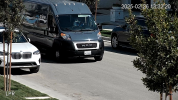
I think my daytime capture is fairly decent and it feels like an appropriate sized kill zone. I'm actually using a 1/10000 shutter in the day.

")