Poor design of new high end Dahua bullet cameras - looking for a workaround

Hey Slacker, been a while. I’m really surprised you have so much gap. On the 7442 (non Z4 I have in hand) it is tight, no gap at all. As I mentioned before certainly caveats with this style of built in junction box but have not seen any gap on this like you showed. BTW I use those power lags (SPAX) on every PTZ install, they are rock solid !
The gap is because of the head of the lag screws hitting the black plastic from the camera. If you look at my picture with the red dots, that's an approximation of where I drilled the holes through for the lag screws.
 
  • Like
Reactions: mat200
Looking at this further, I think that if I drilled the hole for my lag screw in the middle of the raised square that I circled in blue, the head of the screw would fit inside the cutout in the black plastic. I drew yellow dots in this picture to show where the holes for the lag screws might work. Keep in mind I was 20 feet up a ladder in the freezing cold when I mounted this camera. If this housing had 1/4" - 1/2" more depth, none of these workarounds would be necessary.

Camera Housing Base V2.jpg
 
  • Like
Reactions: djernie and mat200
Looking at this further, I think that if I drilled the hole for my lag screw in the middle of the raised square that I circled in blue, the head of the screw would fit inside the cutout in the black plastic. I drew yellow dots in this picture to show where the holes for the lag screws might work. Keep in mind I was 20 feet up a ladder in the freezing cold when I mounted this camera. If this housing had 1/4" - 1/2" more depth, none of these workarounds would be necessary.

View attachment 56062

Hi Andy, @EMPIRETECANDY, when you get a chance can you pass along @Slacker 's suggestions to Dahua on this model. ( deeper housing )

Thanks! and hope you and your family are doing well.
 
  • Like
Reactions: CCTVCam and Slacker
Looking at this further, I think that if I drilled the hole for my lag screw in the middle of the raised square that I circled in blue, the head of the screw would fit inside the cutout in the black plastic. I drew yellow dots in this picture to show where the holes for the lag screws might work. Keep in mind I was 20 feet up a ladder in the freezing cold when I mounted this camera. If this housing had 1/4" - 1/2" more depth, none of these workarounds would be necessary.
I would agree. My eyeball guess shows enough room on the margins to position your lag heads away from the camera base and solve your gap problem. That was the reason for the template to confirm. Working 20ft on an extension ladder is challenging even in best conditions. All understandable. Rather than Dahua making this jbox deeper they could provision the jbox with alternate mounting holes that would work for your type of application. Those long shafted ones seem useless. If they got rid of the long shaft that would work for your needs as well. Good luck!

Slacker's Camera jbox.jpg
 
  • Like
Reactions: mat200
That could work (aiming more middle). Only other options (as there are no other jboxes for these, they are bespoke to cam on 7x42 bullet cams) would be alternative cam solutions. For example 5442-Z4 if you need the Z4 variant OR 7442 (non Z4 unless you added somewhat equivalent PLZ21C0-D lens) box cam version in an external housing. Both of those would give other, regular, more flexible jbox options albeit not the solution you are looking for exactly.

Yes 20ft up a ladder is never fun. When I do this with PTZs they test your arm strength and dexterity for sure.


Looking at this further, I think that if I drilled the hole for my lag screw in the middle of the raised square that I circled in blue, the head of the screw would fit inside the cutout in the black plastic. I drew yellow dots in this picture to show where the holes for the lag screws might work. Keep in mind I was 20 feet up a ladder in the freezing cold when I mounted this camera. If this housing had 1/4" - 1/2" more depth, none of these workarounds would be necessary.

View attachment 56062
 
  • Like
Reactions: djernie
A few thoughts:
-https://www.homedepot.com/p/GRK-Fasteners-9-x-5-in-Star-Drive-Trim-Finishing-Trim-Head-Screw-50-per-Pack-117766/203525331
They're not #8, but the heads might actually be small enough.
-You probably wouldn't be eager to make a hole big enough to use this in the wall, but you could use molly bolts with a long machine screw
-You could mount a metal plate to the wall that's tapped for machine screw in the right locations.
 
  • Like
Reactions: looney2ns
@Slacker - Curious, what type of image do you get from mounting a camera 20ft up?
I think the image is pretty good. This image is with the 7442H-Z4 cam zoomed partially not all the way to the entrance. I think the distance is 70-90ft across the driveway according to the IPVM camera calculator. It does a pretty good job at detecting and pulling the license plate data but all of the settings are currently on Auto which could be tweaked.


Dahua High Quality.jpg
 
Thanks for sharing. The image is very good. Nice job. From the camera labels on the toolbar, I take it this is a commercial application, not a residence, which is what I had assumed.
 
Thanks for sharing. The image is very good. Nice job. From the camera labels on the toolbar, I take it this is a commercial application, not a residence, which is what I had assumed.
Yes. The entrance to two hotels. You can see how I had to re-purpose the wire for 2nd Hall South for this camera until I can get a wire down that hall way.
 
  • Like
Reactions: windguy
I've had to modify a dozen PFA130E mounts in the past, I'm not really a fan of bullet cameras, turrets are more likely to stay in their original position and less prone to being moved out of place.
 
  • Like
Reactions: sebastiantombs
I recently got a new Dahua IPC-HFW7442H-Z4 camera and IVSS7008-2I NVR. I was very impressed with it until I went to mount the camera in it's permanent location. First when I had it mounted in a test location, I had to tighten the screw on the included camera housing so tight that I thought I was going to break something. They engineered the camera and housing to fit so well together that there is barely any rooms to make the connections. (Some CAD designer probably thought they are pretty clever) That wasn't a big problem for me since I only had a single CAT6 wire. When I went to mount the camera on the side of the building in its permanent location the surface was EIFS which I have mounted Dahua camera housings to before with no problem. The first problem was that I needed at least a 4-5" screw to catch the plywood behind the EIFS. Well apparently nobody makes a screw that length that is small enough to fit in the screw hole of the housing. (I checked, Home Depot, Lowes, Menards, Bomgaars, Fastenel). The longer construction screws are either a #9, #10 or bigger and will not fit. After I gave up looking for a screw that would fit, I decided to just drill holes through the back of the housing and not use the holes that were meant to mount the housing. Now I have the housing secured nicely to the side of the building. (Two stories up on a ladder in the freezing cold of Omaha, NE) I go to finish by mounting the camera to the housing and it won't go in all the way. It's 1/8" - 1/4" from the closing the housing. I took it back down and realized that they engineered the housing to fit the camera so tight that the back of the camera was hitting the head of the screw that I mounted the housing with. They actually even have a notched out spot for a spot that was too tight. I ended up just putting a ton of silicone around the housing and camera to fill the 1/4" gap and hoped for the best. It seems ok but man what an absolutely horrible design.

Does anyone have suggestions? This problem would apply to any of the cameras that have the same housing as IPC-HFW7442H, IPC-HFW7842H, IPC-HFW5842H.

Rant over


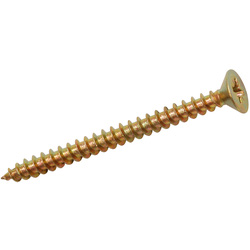
Gold Passivated are excellent for weather resistance. No.5's still quite small.

If too large, a work around, if you can't get get long screws to fit the housing, cut a piece of wood larger than the housing, screw the wood to the facia board using 4 or 5" screws as appropriate and then the camera to the wood using the short screws that will fit.

Not sure what the problem is for space. Looks pretty good for the ethernet connection as drawn out in green by one of the other members. Not sure what you want to touch through that little window at the back as using POE. The green connectors I presume are for external audio. I'd expect something in the housing to plug the hole, otherwise it's an open hole asking for ingress of water. However, as the other connections above aren't waterproof and clearly rely on the housing, I think it's actual function is to function as a key to orientate and lock the camera into the correct position - note the necessity therefore to mount this in the correct orientation.

I agree deeper housing and more space always makes working easier.