Drilling holes into soffit big enough for waterproof connectors

Sybertiger

Known around here
Jun 30, 2018
5,261
15,819
Orlando
Thought I'd get some ideas on what y'all are doing to drill a hole large enough for the waterproof RJ45 connector shells. Did you find that the waterproof shells are 3/4" in diameter and if so I'm assuming you are using a hole saw to cut the hole. I'm hoping a 3/4" hole saw takes out enough to barely squeeze the waterproof shell through the hole as I don't want to make the hole bigger than it has to be.

I'm actually drilling into aluminum soffit...not thrilled at the idea of sharp aluminum making contact with the camera cable so maybe I'll wrap some electrical tape around the wire in the area where it will make contact. Curious to know if y'all are installing rubber grommets into the aluminum hole. It's a shame that we have to make 3/4" holes because of the size of the waterproof shells but it is what it is.
 

Attachments

  • 20190130_204505.jpg
    20190130_204505.jpg
    330.1 KB · Views: 180
Thought I'd get some ideas on what y'all are doing to drill a hole large enough for the waterproof RJ45 connector shells. Did you find that the waterproof shells are 3/4" in diameter and if so I'm assuming you are using a hole saw to cut the hole. I'm hoping a 3/4" hole saw takes out enough to barely squeeze the waterproof shell through the hole as I don't want to make the hole bigger than it has to be.

I'm actually drilling into aluminum soffit...not thrilled at the idea of sharp aluminum making contact with the camera cable so maybe I'll wrap some electrical tape around the wire in the area where it will make contact. Curious to know if y'all are installing rubber grommets into the aluminum hole. It's a shame that we have to make 3/4" holes because of the size of the waterproof shells but it is what it is.
use a junction box designed for the camera, will look clean.
 
Junction boxes look clean and if you are going to crimp your own end on (which will let you use the other end of the waterproof shell), I think you only need to drill a 3/8" hole...
 
Last edited:
  • Like
Reactions: Sybertiger
Thanks everyone for the reply. I agree that a 1/4" hole is better than a 3/4" hole especially if one day you want to remove the camera it'll be easier to plug the smaller hole with a rubber grommet. I'll take a look at Dahau PFA130-E or PFA137 might be adequate since it'll be under the soffit.
 
  • Like
Reactions: aristobrat
Another dodge is to mount the camera on 2"x1/8" aluminum flat stock, painted to match, and cut to a length that matches the width of the soffet. Tuck the flat stock into the angle stock that caps both ends of the soffett and secure with silion seal, RTV, or your choice of sealants. The flat stock can be located at a corrugation in the soffet so the wire can be tucked into that channel, out of sight. No holes needed at all.

Scroll down in this thread for a not so pretty example I kludged together and have since replaced minus the clamps - Suggestions for how to mount Dahua Jbox on soffit?
 
Last edited:
Another dodge is to mount the camera on 2"x1/8" aluminum flat stock, painted to match, and cut to a length that matches the width of the soffet. Tuck the flat stock into theangle stock that caps both ends of the soffett and secure with ilion seal, RTV, or your choice of sealants. The angle stock can be located at a corrugation in the soffet so the wire can be tucked into that channel, out of sight. No holes needed at all.

Scroll down in this thread for a not so pretty example I kludged together and have since replaced minus the clamps - Suggestions for how to mount Dahua Jbox on soffit?

Here are some pics of how I had temporarily mounted cameras that came in a packaged system I was evaluating 6 months ago (which is why you see the cables on the outside of the house). That was a LaView system and it was terrible. I also had tried out a Lorex system next that was better but still didn't meet my objectives. I've since settled on Blue Iris and Dahau starlight turrets. Now that I've settled on a system I'm working on "permanent" mounting/wiring. I'll be priming/painting the aluminum bar to match. Those 3/4" water proof connectors are just too large to fit in the channels of the soffit so the suggestion to use Dahau junction boxes seems like the better solution than drill 3/4" holes into the soffet.

epP13Nb.jpg


BnAtsjw.jpg
 
Yes, that connector is too big for the channel. The trick is to mount the camera closer to the house so that the connector ends up above the soffet. Problem solved, no holes, just a little notch for the cable is all that's needed. Yes, it can be tricky to get everything into place that way, but it can be done fairly easily, especially if I can do it :lmao:
 
Yes, that connector is too big for the channel. The trick is to mount the camera closer to the house so that the connector ends up above the soffet. Problem solved, no holes, just a little notch for the cable is all that's needed. Yes, it can be tricky to get everything into place that way, but it can be done fairly easily, especially if I can do it :lmao:


Do you have a picture you can post so we can see how you handled your wiring going into the soffit/house? Thanks!
 
The only thing I could do, at the moment, is take a shot of a 4231 that's installed. Later this week I'll be doing some work on it, changing it from a 12v supply to PoE, so I'll have the soffet open and will take some crummy cell phone shots but they should show what you want to see. The biggest trick is getting the first piece of soffet out, and back in when done. That is the most time consuming part along with bending the lip of the flange back into shape. Our soffet is stapled into place with 1-1/2", 18 gauge wire staples (probably fired from an air gun, and I usually end up clipping them off as flush as I can and using a screw or two when I put it back together.
 
Yes, that connector is too big for the channel. The trick is to mount the camera closer to the house so that the connector ends up above the soffet. Problem solved, no holes, just a little notch for the cable is all that's needed. Yes, it can be tricky to get everything into place that way, but it can be done fairly easily, especially if I can do it :lmao:

Part of the concern with mounting a camera too close to the house when directly under the soffit you risk some washout with the IR lights bouncing off that white soffit. You'll note that the pic of the bullet camera I mounted is all the way back but only because it's a bullet camera that protrudes pretty far out. You can see the dome camera was mounted is the middle instead of up against the house. I have since decided that dome cameras are a bad idea for outside the house which is why I'm going with a turret (eyeball) design.
 
It will depend on the soffet width. Luckily, at least it's lucky for this kind of application, our soffets are kind of shallow so IR reflections aren't a problem. A dodge around that problem is to use an external IR source like I do in that photo and you'll see in the photos I take on Monday or Tuesday. No problems with reflections then plus it diverts the attention of miscreants, at night especially, from the camera.
 
OK. Finally found the right round to it and got that 4231 powered by PoE instead of a wall wart yesterday and took some pictures. Hope this helps.

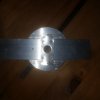
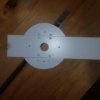
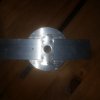
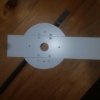
First is the mounting strip after assembly and before painting. I use pop rivets to hold the semi circles to the main strip, drill and tap mounting holes for to match the camera being used. The mounting strip painted and ready for use is next.

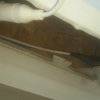
The next shot shows the cut I make in the vinyl channel that's nailed to the side of the house to retain the soffet to the house. A pair of aviation shears works quite well for this. Snip and bend the vinyl out of the way. Of course you need to line that up with the channel in the soffet you're going to hide the cable in.

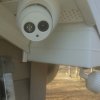
The next shot shows the camera mounted, sans soffet, to demonstrate the connectors on the cable are long enough to reach past the soffet and retaining channel.

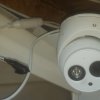
The final shot is the camera mounted and working. Note the IR illuminator facing away from the camera. It's providing light for an SV3C-POS camera that I want to replace with another Dahua 4231. Actually, when I replace that one, I'll add a second illuminatior in the same location pointed the same way as the camera.


20180619_130610.jpg 20180619_130739.jpg 20190205_145323.jpg 20190205_145606.jpg 20190205_150048.jpg
 

Attachments

  • 20180619_130610.jpg
    20180619_130610.jpg
    885.4 KB · Views: 25
  • 20180619_130739.jpg
    20180619_130739.jpg
    2 MB · Views: 28
Just finished mounting some cameras and thought I'd post some pictures. I went with the approach of drilling a 1/4" hole into the aluminum soffit. If you ever decide to remove the cameras you can plug the hole with a plastic plug such asTHESEor a similar product and it'd be hard to notice by most people. I decided to mount the cameras 2/3 the way back from the facia leaving enough room behind the camera to get a paintbrush behind them the next time the house gets painted...but really the lens is fairly in the middle of the soffit. Using two pieces of flat aluminum stock I felt the camera would be steadier and very difficult to remove without first removing one of the supports.

D8ZywGw.jpg

AfilNXY.jpg

XWfDHUl.jpg

foZe7O2.jpg
 
Last edited:
Old thread but very helpful. I'm hopefully going to mount some cameras this weekend.

I also have a long gutter (about 50') in front so can't remove the soffits. This method is nice.

Couple of questions.
1. Any one mount 2 cameras side by side on the same bars? I was thinking one turret and one bullet for LPR.

2. My eave is very deep (2 feet deep because of low slope roof). Is it better to mount the camera near the house, in the middle, or near the gutter? I feel aesthetically speaking it looks nicer/cleaner if near the house but worried about IR reflection from gutter.

3. Similar to question #2 but in one spot I also have a bow window to deal with. I'm guessing further away from house and closer to gutter is better for that spot.

I found this pic online from someone and this is EXACTLY the same situation I have in that one spot. This would also be where I am thinking of mounting the LPR camera too. On the other side of the window (right side) is my front door that I want to observe. Thought of putting the camera in the small space between window and door but the lamp would probably cause a large glare at night as well as someone can reach over and mess with the camera.

bow window.jpg

I have aluminum soffits so not very forgiving to bend to try and "tuck" the wire behind. I may have to drill a hole where I want the camera and wire to go but may need to move/adjust later which is why I like this method. In case I have to move the camera and some of the cable is exposed, do I need to get outdoor rated cable? If yes, anyone ever use this brand:
3. If I decide to mount the bullet/LPR camera further down on the wall, do you think the IR will cause problems for the turret camera?

Thanks in advance.
 
Last edited:
As an Amazon Associate IPCamTalk earns from qualifying purchases.
  • Like
Reactions: mat200
Old thread but very helpful. I'm hopefully going to mount some cameras this weekend.

I also have a long gutter (about 50') in front so can't remove the soffits. This method is nice.

Couple of questions.
1. Any one mount 2 cameras side by side on the same bars? I was thinking one turret and one bullet for LPR.

2. My eave is very deep (2 feet deep because of low slope roof). Is it better to mount the camera near the house, in the middle, or near the gutter? I feel aesthetically speaking it looks nicer/cleaner if near the house but worried about IR reflection from gutter.

3. Similar to question #2 but in one spot I also have a bow window to deal with. I'm guessing further away from house and closer to gutter is better for that spot.

I found this pic online from someone and this is EXACTLY the same situation I have in that one spot. This would also be where I am thinking of mounting the LPR camera too. On the other side of the window (right side) is my front door that I want to observe. Thought of putting the camera in the small space between window and door but the lamp would probably cause a large glare at night as well as someone can reach over and mess with the camera.

View attachment 200166

I have aluminum soffits so not very forgiving to bend to try and "tuck" the wire behind. I may have to drill a hole where I want the camera and wire to go but may need to move/adjust later which is why I like this method. In case I have to move the camera and some of the cable is exposed, do I need to get outdoor rated cable? If yes, anyone ever use this brand:
3. If I decide to mount the bullet/LPR camera further down on the wall, do you think the IR will cause problems for the turret camera?

Thanks in advance.

Test placement before drilling .. some add a junction box for the pigtail, which also gives you a addition drop of 1.5 inches or so .. and that can help reduce ir bounce back from the gutter .. some will add more blocking to get the cameras down even lower
 
As an Amazon Associate IPCamTalk earns from qualifying purchases.
  • Like
Reactions: AlwaysSomething
Test placement before drilling .. some add a junction box for the pigtail, which also gives you a addition drop of 1.5 inches or so .. and that can help reduce ir bounce back from the gutter .. some will add more blocking to get the cameras down even lower

Yeah I built a test rig similar to Looney's that I can use for most locations. However 2 locations are about 1.5 -2 stories up and the property has a deep slope (30-45 degrees side to side) so not easy to place a test rig or even a ladder there. Unfortunately one of the locations is where the bow window is and is also the same spot where I want the 2nd cam for LPR. However, the LPR might get attached to the brick wall which means I can't use the metal bar method and easily move it. :( Figures, put all the difficult variables in the same spot. I updated my previous thread with the picture embedded (someone's else setup).

I like that the bar can moved/removed and drilled/retapped so I can try different setups. I may have more questions about the 2 cam setup in same location but I'll search more before that and if need be a new thread.

Thanks again.
 
  • Like
Reactions: mat200