Upload to YouTube, then share the link here.how do I post a video clip here in this thread?
I need you guys to visually check auto focus on a camera. I think the camera doesn't focus well. In some part of the auto-focusing process, at one point everything is in focus.However, the camera doesn't stop there but continues on to a slightly out-of-focus final.
Review-Dahua Starlight IPC-HDW5231R-ZE 800 meter capable ePOE
- Thread starter looney2ns
- Start date
You are using an out of date browser. It may not display this or other websites correctly.
You should upgrade or use an alternative browser.
You should upgrade or use an alternative browser.
EmptyWallet
Young grasshopper
- Aug 23, 2017
- 34
- 1
Well..anyone know a way to mount this camera to a square junction box? Wherever I had them drop Cat6 when building the house...they dropped them in junction boxes and then bricked/drywalled around it...and then installed a plate over the front. So...good news is that there is plenty of room to coil up wire there. Bad news is neither of the mounts that I have for these cams, the holes don't line up with the junction boxes.
Any thoughts?
Any thoughts?
mat200
IPCT Contributor
- Jan 17, 2017
- 16,545
- 27,808
Well..anyone know a way to mount this camera to a square junction box? Wherever I had them drop Cat6 when building the house...they dropped them in junction boxes and then bricked/drywalled around it...and then installed a plate over the front. So...good news is that there is plenty of room to coil up wire there. Bad news is neither of the mounts that I have for these cams, the holes don't line up with the junction boxes.
Any thoughts?
Hi Empty,
You'll need to custom make it. I would probably look for a nice sturdy outdoor rated cover plate and pull out the drill press....
EmptyWallet
Young grasshopper
- Aug 23, 2017
- 34
- 1
Hi Empty,
You'll need to custom make it. I would probably look for a nice sturdy outdoor rated cover plate and pull out the drill press....
I think I can figure that out. Any suggestions on the cover plates?
I think I can figure that out. Any suggestions on the cover plates?
All depends on what box they used. Single gang, 2 gang, round?
But one made of aluminum or stainless steel would work.
Home Depot has a large selection.
EmptyWallet
Young grasshopper
- Aug 23, 2017
- 34
- 1
All depends on what box they used. Single gang, 2 gang, round?
But one made of aluminum or stainless steel would work.
Home Depot has a large selection.
Single gang, blue plastic. Looks like this:
Shop CARLON 1-Gang Blue Plastic Interior New Work Standard Switch/Outlet Wall Electrical Box at Lowes.com
I ordered a variety of wall plates, we'll just have to see what works. Here's what I ordered:
https://www.amazon.com/gp/product/B01MSFO2RB/ref=oh_aui_detailpage_o01_s00?ie=UTF8&psc=1
https://www.amazon.com/gp/product/B01NBPFPFN/ref=oh_aui_detailpage_o01_s00?ie=UTF8&psc=1
https://www.amazon.com/gp/product/B000FKDMDM/ref=oh_aui_detailpage_o01_s00?ie=UTF8&psc=1
https://www.amazon.com/gp/product/B005GDFYF2/ref=oh_aui_detailpage_o02_s00?ie=UTF8&psc=1
Any thoughts on any of those?
As an Amazon Associate IPCamTalk earns from qualifying purchases.
mat200
IPCT Contributor
- Jan 17, 2017
- 16,545
- 27,808
Single gang, blue plastic. Looks like this:
Shop CARLON 1-Gang Blue Plastic Interior New Work Standard Switch/Outlet Wall Electrical Box at Lowes.com
I ordered a variety of wall plates, we'll just have to see what works. Here's what I ordered:
https://www.amazon.com/gp/product/B01MSFO2RB/ref=oh_aui_detailpage_o01_s00?ie=UTF8&psc=1
https://www.amazon.com/gp/product/B01NBPFPFN/ref=oh_aui_detailpage_o01_s00?ie=UTF8&psc=1
https://www.amazon.com/gp/product/B000FKDMDM/ref=oh_aui_detailpage_o01_s00?ie=UTF8&psc=1
https://www.amazon.com/gp/product/B005GDFYF2/ref=oh_aui_detailpage_o02_s00?ie=UTF8&psc=1
Any thoughts on any of those?
HI Empty,
I like the thicker outdoor rated ones.. Aluminum
Feel it gives me a better plate to attach to.
As an Amazon Associate IPCamTalk earns from qualifying purchases.
EmptyWallet
Young grasshopper
- Aug 23, 2017
- 34
- 1
HI Empty,
I like the thicker outdoor rated ones.. Aluminum
Feel it gives me a better plate to attach to.
So aluminum..not steel? Thicker ones than what I linked above? Do you have any links?
mat200
IPCT Contributor
- Jan 17, 2017
- 16,545
- 27,808
So aluminum..not steel? Thicker ones than what I linked above? Do you have any links?
HI Empty,
No links.. I just normally go to the local Home Depot and pick up what I need, faster and easier for me than ordering online.
EmptyWallet
Young grasshopper
- Aug 23, 2017
- 34
- 1
HI Empty,
No links.. I just normally go to the local Home Depot and pick up what I need, faster and easier for me than ordering online.
Got it! I'm going to try it.
awsum140
Known around here
I've taken to making my own covers. I use 1-1/2" or 2" by 1/8" aluminum flat stock with a back plate of flashing, pop riveted, to get the width I want. Then I cut, grind, file, sand to get things right. Drill and tap the mounting holes I need, prime with aluminum primer and paint to match where they're going. A little work but worth the effort, at least to me. Aluminum primer needs a long time, as in two days, to dry and bond completely which makes it a little slow.
giomania
IPCT Contributor
- Jun 1, 2017
- 784
- 540
I've taken to making my own covers. I use 1-1/2" or 2" by 1/8" aluminum flat stock with a back plate of flashing, pop riveted, to get the width I want. Then I cut, grind, file, sand to get things right. Drill and tap the mounting holes I need, prime with aluminum primer and paint to match where they're going. A little work but worth the effort, at least to me. Aluminum primer needs a long time, as in two days, to dry and bond completely which makes it a little slow.
Pictures! We need some DIY “porn”!


Sent from my iPhone using Tapatalk Pro
EmptyWallet
Young grasshopper
- Aug 23, 2017
- 34
- 1
Pictures! We need some DIY “porn”!
Sent from my iPhone using Tapatalk Pro
yes! I want to see too.
Burton_Flooring
Pulling my weight
- Apr 20, 2018
- 133
- 163
Not sure if this helps with what your particular project entails but I just finished installing these for our business.
I mounted this on the Dahua Corner bracket (PFA121 will also work)
PFA122: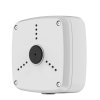
Then I mounted PFB203W to this by simply using self-tapping sheet metal screws:
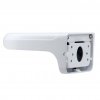
I laid a bead of Caulk on the PFB203W, let it cure, and when screwed onto the PFA121, it makes a waterproof gasket:

Can also be done on a round junction box (but the square one looks nicer). This means you can change cameras (or mounts for that matter) by loosening a SINGLE set screw. Easy-peasy.

Because it's square, it is easy to drill a second hole in the side and use standard 1/2" electrical conduit (w/ waterproof compression fittings). This allowed me to mount two on a corner without any unnecessary holes in the building

I mounted this on the Dahua Corner bracket (PFA121 will also work)
PFA122:

Then I mounted PFB203W to this by simply using self-tapping sheet metal screws:

I laid a bead of Caulk on the PFB203W, let it cure, and when screwed onto the PFA121, it makes a waterproof gasket:

Can also be done on a round junction box (but the square one looks nicer). This means you can change cameras (or mounts for that matter) by loosening a SINGLE set screw. Easy-peasy.

Because it's square, it is easy to drill a second hole in the side and use standard 1/2" electrical conduit (w/ waterproof compression fittings). This allowed me to mount two on a corner without any unnecessary holes in the building

As an Amazon Associate IPCamTalk earns from qualifying purchases.
If you haven't you will have to adjust the night time settings to get the best result.
The higher you have the cam mounted, the less distance the IR will transmit.
You also have to be aware of the IR reflecting off of things back into the lense, which affects the exposure, thus the need for adjustments for each situation. More light never hurts, you can purchase an additional IR flood for $20-$30.
Make sure IR isn't reflecting off the house siding, the soffit, etc. Adjust the view if it is.
Thats what I see with the ZE.If you haven't you will have to adjust the night time settings to get the best result.
The higher you have the cam mounted, the less distance the IR will transmit.
You also have to be aware of the IR reflecting off of things back into the lense, which affects the exposure, thus the need for adjustments for each situation. More light never hurts, you can purchase an additional IR flood for $20-$30.
Make sure IR isn't reflecting off the house siding, the soffit, etc. Adjust the view if it is.
Attachments
awsum140
Known around here
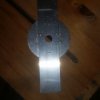
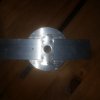
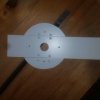
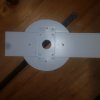
Here's the DIY porn for all the porn lovers. These are actually for soffet mounts but just continuing the cut through the center strip would make them into a box cover if that's what's needed. They're both a 2" strip for the center piece and I used two short pieces of 1-1/2" to make the "half moons". The flashing being on the back only makes the wings a little floppy until the camera base gets mounted, but then it's really nice and solid. A second piece of flashing could be added to the front, I guess, if you wanted something rigid before the camera gets mounted. These are for Dahua IPC-HDW4231EM-ASE cameras.
Attachments
EmptyWallet
Young grasshopper
- Aug 23, 2017
- 34
- 1
awsum140
Known around here
Thanks, but it looks great as long as your about ten feet away. Given that they're up on a soffet they do look fine. I'll admit to not taking the time to make them perfect circles though, just enough to get all the edges smooth. If I do one for an electrical box, I'll probably add another piece of flashing to the front for more rigidity. The holes for the rivets are "eyeballed" on the drill press so they may not be totally symmetrical.
I do want to stress painting them, raw aluminum, is different than painting steel, etching primers won't work, or plastics, bonding agents don't work. The aluminum oxide needs to be removed prior to painting, and there is oxide on it whether it looks like there is or not. I wash them with dish detergent and an abrasive 3M pad, grey or red will do fine. After drying them, apply a light coat of primer specifically made for aluminum. After a ten minute "flash off", apply another light coat to fully cover. Let that dry for 36 to 48 hours depending on the temperature, the warmer it is the less time needed but I'd let it cure for at least 36 hours to be safe and get a good bond. After that a couple of light finish coats and you're good to go. Home Despot carries Rustoleum Aluminum Primer so it's easy to find.
I do want to stress painting them, raw aluminum, is different than painting steel, etching primers won't work, or plastics, bonding agents don't work. The aluminum oxide needs to be removed prior to painting, and there is oxide on it whether it looks like there is or not. I wash them with dish detergent and an abrasive 3M pad, grey or red will do fine. After drying them, apply a light coat of primer specifically made for aluminum. After a ten minute "flash off", apply another light coat to fully cover. Let that dry for 36 to 48 hours depending on the temperature, the warmer it is the less time needed but I'd let it cure for at least 36 hours to be safe and get a good bond. After that a couple of light finish coats and you're good to go. Home Despot carries Rustoleum Aluminum Primer so it's easy to find.

