IP Camera System General Considerations
Information in this section was contributed by
@matt200 and
@giomania
Common Mistakes
- Brand preference: No single manufacturer system or product is able to do it all.
- Megapixel (MP) Mania: 4K / 8 MP cameras are great in daylight, but 2 MP cameras (specifically with 1/2.8" sensors or bigger <i.e. 1/1.8">) are almost always better at night. The most important parameters for obtaining a good image in low light are: sensor model and size, f stop, lens quality, and software / firmware; see this comparison.
- Too few cameras installed: If you are in a position to pre-wire, plan for at least 6-8 cameras
- Mounted too high: Mount cameras < 8 feet high to get a good angle for potential identification.
- Poor quality, low resolution, or wide-angle cameras, resulting in inadequate identification.
- Not recording all the time: Motion detection and video snap shots do not mitigate this requirement.
- Reliance on Wi-Fi cameras and cloud connectivity systems: Doorbell cameras are the only exclusion.
- Reliance on indoor cameras to view the exterior through windows: Window glass typically will reflect IR signals, thus rendering PIR motion detection and IR base night vision nearly useless.
- Installing dome cameras outdoors. Dome cameras have more glare and IR reflection issues, as well as decay of the plastic dome due to long-term direct UV exposure. Turret / Eye ball form factor cameras are preferred.
- Installing cameras prior to bench / desk testing.
Consider Your Goals
- What time of day is the threat the greatest, so you can choose the right cameras for the job. For most of us it is the nighttime, and a camera that works best at night will work in daytime much better than the other way around.
- Do you want cameras mounted in obvious locations that stand out and deter potential perpetrators, blend into your décor, or both?
- If you want to capture license plates, you may need to dedicate a camera to this, as it requires camera tuning adjustments that make the overall picture darker.
- If you want to keep an eye on your parked cars, it is recommended to have two cameras mounted so they crisscross the area.
- Do you want to see wildlife activity?
- Do you want to design the system for Detection, Observation, Recognition, Identification (DORI) or all of them? Member wittaj put together a post demonstrating the value of optical zoom over digital zoom.
- Detection: Determine with a high degree of certainty whether or not a person is present
- Observation:
- Recognition: A high degree of certainty that an individual is the same person seen before.
- Identification: Detail sufficient to enable establishment of identity beyond reasonable doubt.
Network Video Recorder (NVR) Options
Any dedicated manufacturer NVR should match the cameras, as each vendor has proprietary advanced features beyond the ONVIF specifications. Each manufacturer offers NVR’s with integrated Power over Ethernet (PoE) ports that are easy to setup, and is the most affordable recording solution. They also offer
NVR’s without PoE power that require a separate PoE switch to power the cameras. While more expensive, this allows greater flexibility, and makes it easier to directly access cameras.
Last, a dedicated PC running Video Management Software (VMS) like Blue Iris and a separate PoE switch offers the maximum flexibility. A number of power users really like the flexibility and features. If you're willing to take the time and source a good used Windows PC w/a CPU that has h.264 hardware features you can find a nice system at a decent price that can do this for you.
System Size Considerations
For a modest house, expect decent outdoor coverage with 6-8 good cameras. For better coverage and / or larger houses, plan on getting a system which can support up to 16+ cameras.
Camera Location Recommendations
Exterior
- Approach to the front door (2x)
- Driveway / Parking area (2x)
- Sidewalk / street in an attempt to ID vehicles
- Dedicated License Plate Reader (LPR)
- Front door area for identification
- Front door area for package monitoring
- In the lawn looking back at the front of the house
- Approach to the “man” door on the side or back of the garage
- Each side of the house
- Rear of the house (2x)
- Rear entrance
Interior
- Inside the garage
- At each entrance door
- Facing out from the TV/media center area at face level, possibly hidden
Resolution Considerations
8MP / 4K cameras - sometimes you need better resolution during the day and under other well lighted conditions. A 4K camera can give you that, note they are not optimized for low light conditions.
Examples:
Pre-Wiring & Cable Suggestions
Camera/Setup Recommendations New House? Great pre-wire advice from
@Fastb
Suggestions on ethernet cable Cable Sources and terminating Cat5e/Cat6 cables RJ45
In general, pull an extra category cable to each location where a device is planned, and leave a bit of extra slack on both ends of the cable, just in case you need to adjust placement. Avoid kinks in the cable and do not apply extreme pressure with cable fasteners. Do not run cables next to motors / fluorescent lighting, or in close proximity to unshielded Romex / NM electrical wiring, unless it is EMT conduit, which is shielded.
Did you overlook running enough cat5e/cat6 lines to a location? Try a
1-4 PoE extender/splitter. Alternatively, you can try
splitting Cat5 to run 2 Poe cameras, either wiring it yourself or using
this splitter kit.
Wireless Camera Pole Install for when you don’t have any cable, hook3m has a solution.
Required Reading
Forum member
@wopi82 posted a great
review of the Dahua IPC-HDW4231EM-AS, but he also discusses sensors, image processers, and lenses in great detail. This is highly recommended, as you will learn a lot even if you do not plan to purchase this particular model. He also posted a review of the
Dahua IPC-HDW5831R-ZE. The level of detail and insight in his reviews are incredible!
Camera Setting Suggestions For Facial Identification
This thread included some specific settings adjustments for HikVision cameras for improving facial identification at night, and this advice may serve as guidelines for experimentation with other cameras:
- Starting from the default settings, increase exposure until the face isn't overexposed; probably ~1/100 or more.
- WDR ON, Wide Dynamic Level 5.
- Digital Noise Reduction 50.
Detection, Observation, Recognition, and Identification (DORI) Parameters
DORI as a framework to evaluating the performance of a visual device originates with John Johnson's work as a US Army Scientist in 1957-58. With the advert of digital cameras now pixels / resolution / FOV can be used to calculate a useful DORI reference. This allows comparisons between cameras from the specifications, and can be useful to determine if a camera can capture an ID image at a certain range.
Research has been done to determine how many pixels are needed from a facial image to be able to have a high probability to ID a subject.
For identification, Axis recommended 80 horizontal pixels across the face in this document from 2014.
Challenging conditions: Situations with very varying or weak lighting. People, objects and vehicles are seen from an angle where details are in shade, or facing away from the camera. It could also occur in situations where people, objects and vehicles are moving at very high speed through an area. More often occurring in outdoor situations without additional lighting, or indoor situations during very dark conditions.
The above chart translates into the following Pixels Per Foot (ppf) numbers for an average size face ( 16cm / 6.3 inches wide ):
Identification (challenging conditions): 150 ppf [80 pixels across the horizontal of an average face]
Identification (good conditions): 75.6 ppf [40 pixels across the horizontal of an average face]
In Europe / Britain there is a DORI standard which has the following parameters (EN-IEC 62676-4)
Detect (8 ppf)
Observe (19 ppf)
Recognize (38 ppf)
Identify (76 ppf)
Numerous AI / Face detection algorithms may require more pixels per face, and thus more pixels per foot ( or pixels per meter ). Verkada for example recommends 150 ppf for face recognition features such as face search and person of interest alerts.
( Verkada: User Guide for People Analytics )
Given the Identification parameters above of 75.6 – 150 Pixels Per Foot (ppf) noted above, 100 ppf represents a number in the middle, and makes the calculations easier. The DORI specs from Dahua seem to use the EN-IEC 62676-4 specifications, i.e. 76ppf for Identify. For many IPCT members we prefer to use 100ppf, as this allows for more of a margin of error and a less than perfect straight on facial ID image capture. To achieve a 100 ppf identification goal, adjust the focus and placement of cameras used for
this purpose. Mount the cameras less than 8 feet ( 6-8 feet high is a typical recommendation ) to ensure a good angle for identification purposes. Measure the distance between the potential camera locations and the target area to determine if you are within the ID distance, and help in selecting the proper camera.
The equation to calculate the Radius (the distance in feet) for identification for 100 ppf as discussed above: Radius = (( Horizontal Res / 100 ppf ) * ( 360 / H FOV Angle ))/2*Pi
A 2MP / "1080p" camera with the same FOV will have 1/2 the DORI ranges of a 8MP / "4K" cameras.
A 4MP camera with the same aspect ration will have the DORI ranges be 1/2 way between the 2MP and 8MP cameras.
A wider FOV camera will have shorter DORI ranges.
When calculating the DORI specifications we are assuming the resolution is effective pixels. Low light, Compression, WDR, HDR, rain, fog, image noise, glare, bright light(s), spiders / bugs, all can significantly reduce the quality of the image capture.
DORI ranges, while not perfect, can help you compare and contrast various cameras and FOV options. Do not expect to be able to positively ID an unknown suspect significantly further than the calculated values.
WDR & BLC Explained - Capturing Images Under Challenging Lighting Conditions
Thanks to forum member wopi82 for
this link, which is a comparison between three different wide dynamic range technologies; D-WDR, WDR, and BLC. The information below has been assimilated.
 Wide Dynamic Range (WDR)
Wide dynamic range technology in analog and digital IP cameras can allow capture of good images even under challenging light conditions. WDR can maintain proper image brightness, exposure, and contrast while ensuring image clarity. DB is the value used to measure the WDR range or capability, with a higher number (i.e. 120DB), indicating capture of a greater brightness range.
Proper calibration of WDR level is essential to achieving the best result: Setting the WDR level too low may not produce satisfying visibility, while setting the WDR level to high may lead to washed out images. It should be carefully adjusted for the most challenging lighting conditions for each camera to minimize possible image deterioration. Ideally, it would be adjusted while viewing on a good quality, (preferably calibrated) display device.
Digital Wide Dynamic Range (D-WDR)
Digital WDR (D-WDR) is a software-based technique that optimizes image quality by adjusting the gamma (γ) value to enhance dark areas. The D-WDR level ranges from 1 to 8.
True Wide Dynamic Range (True WDR)
True WDR is a sensor-based technology that can capture several images with short and long exposures, then combining them into a single frame. Cameras with this technology can produce images with extremely wide dynamic range. True WDR can be adjusted using three pre-set levels (Low/Mid/High).
Glossary / Acronyms for Video Surveillance
Courtesy of IPVM, an online, continuously updated glossary of the most used and common acronyms and terms used in CCTV.
Click
here.
IP Camera Locator Tool
As noted in
this thread, the
IPVM calculator tool is a good resource to assist in determining which camera to get, or if the camera you want to get has the appropriate Field of View (FOV). A Dahua Varifocal camera can also be used on-site to determine the appropriate Field of View (FOV) for fixed focal length cameras; there is additional information below.
LAN Security Suggestions
ALL security camera companies have significant security issues so it is critical to properly isolate the cameras from the internet to dramatically reduce the attack surface and the threat to your network. Change the default username/password on your cameras and all devices on your network. Isolate the cameras from your LAN if some users should not be able to access the NVR or cameras. To isolate cameras, use either a Virtual LAN (VLAN)-capable router or a router with independently configurable ports, and static IP address routes defined in the firewall. See this
Network Security Primer and this
VPN Primer by forum member nayr for further details.
A quick explanation of VPN’s by @aristobrat:
Most VPNs are one-way. The type of VPN a lot of folks here setup for IP camera viewing is for "inbound" traffic. This type of VPN will encrypt their traffic initiated from the Internet side of their home router (i.e. from their mobile phone, or from their work computer) that is trying to access inside their home network. This type of VPN does NOT encrypt initiated from inside their home network. So when they're at home on their laptop, this VPN is not encrypting traffic from that laptop going out to the Internet.
The paid VPN service you have works similarly (one-way), but opposite of the example above. It encrypts
traffic initiated from within your home network that is trying to access the Internet, but it doesn't encrypt traffic initiated from the Internet that's trying to access your home network.
With the proper router firewall rules set up in the proper order, cameras can be protected and still be useful (email notifications) with accurate time (NTP time server access). For example, if you allow email and/or NTP time server communication, put those rules above any “block all traffic” rule. Firewalls stop processing rules when it finds the first one it encounters. NTP time servers require access to port 123/UDP, so if the time server is outside the LAN subnet where your cameras reside, this port would need to be allowed through the firewall.
Also block the easy4ip service in your router, if possible, in case disabling it in the camera settings doesn’t work; and then put on your tin foil hat ")
LAN Router Suggestions
Asus Router Line - Added 3/13/19
The Asus Router Line has a reputation for being reliable, having built in VPN options and also built in DDNS. A very popular option is the
AC1900 which also supports
IPCT DDNS.
The
Ubiquity EdgRouter product line has independent LAN ports that can be configured with different subnets. The most affordable option is the
Ubiquity EdgeRouter X ($68.45 as of 3/13/19). They also feature OpenVPN compatibility, and there are instructions available on how to set this up, as noted below.
Update: I spent about 50 hours getting OpenVPN set up on my EdgeRouter, as I had a steep learning curve with Command Line Interfaces (CLI). I created a detailed step-by-step guide for myself, and am willing to share the document; just let me know (@giomania on IPCamTalk).
Dahua Purchasing Information
We offer Dahua cameras in the
IPCT Store that have USA firmware, come with a 30-day money back guarantee and 1-year replacement coverage. Purchasing here also helps keep IP Cam Talk alive!
Forum member
@EMPIRETECANDY also sells his cameras at a discounted rate in the
IPCT Store, has an
Amazon Shop &
AliExpress Store and is a trusted seller.
He sells international version cameras without the Dahua logo on them by default, but can also get the branded versions (at higher cost) upon request. To contact Andy,
send a private message here, (member discounts available). After finalizing the order (don’t forget the mounts), provide a PayPal ID, and Andy sends an invoice for payment. Ensure the address on your PayPal account is correct. Andy ships the product via DHL (3-days, typically) by default. If you want to save money, he can also send them via e-Packet (3-4 weeks) upon request, but only for one camera.
Dahua International Vs. Chinese Market Models
There are less expensive Chinese market versions of the Dahua cameras sold on Ali Express, but the sellers may install hacked English firmware on them. The manufacturer has to make compromises (i.e. RAM, sensor, DSP, CPU, case material, MicroSD card slot, etc.) to reach the lower price point. These cameras have been reported with various issues, including
the inability to safely flash Dahua U.S. firmware. The international versions sold by Andy can indeed accept the Dahua U.S. firmware. However, there are instances where members
wittingly purchased Chinese version cameras, due to the cost savings for large installations. This is not recommended for the inexperienced, but if you are willing to accept some risk, and able to mitigate the potential issues, there is an interesting discussion in
this thread.
Dahua International Vs. U.S. Models
The recommended cameras listed below are international “Starlight” 2-Megapixel models with a Sony “Starvis” sensor. To understand why some sensors are better at night vision (larger pixels, etc.), see the
Latest Sony Sensor List, or
this nice chart of sensors used in Dahua cameras. The International and U.S. camera models are identical, with the exception of the model number, the logo, and price premium. Some companies also rebrand Dahua cameras, and create surveillance system kits. (Foscam, Lorex, Qsee, etc.). The options are to buy from a US retailer at a price premium, or buy it directly from china and save. Andy supports the products, and has even replaced defective units; you have to ship it back to him.
Dahua Firmware Updates
Before installing firmware, it is suggested to thoroughly research any potential compatibility problems or issues. Dahua started signing their firmware in 2017 (varies by model), which prevents installation of older, non-signed versions. If you are unable to install older firmware, or inadvertently brick your camera while upgrading, see the Dahua Camera Firmware Rollback / Brick Recovery section.
Before applying a firmware update, save the camera configuration so it can be reloaded later. After applying a firmware update, you must factory default (reset) the camera in the Web UI (Setup > System > Default). This post-firmware upgrade default process has fixed various issues; you have been warned.
Since the camera will revert to the default settings (including the network configuration), reconnecting to the camera may be problematic. The default fixed IP address for Dahua cameras is 192.168.1.108, which may cause the following issues: IP conflicts if this address has already been assigned by the router, or an inability to reach the camera if you have a subnet that is not 192.168.1.X. Using the Dahua ConfigTool should mitigate either of the above scenarios. See the section below on Dahua Camera Viewing / Management Options - Desktop Computer. Once you have reset the camera network configuration (Setup > Network > TCP/IP), reload the saved camera configuration.
Dahua Day/Night Switch Utility – DahuaSunriseSunset
Dahua day/night switch utility - DahuaSunriseSunset
This utility is useful, as Dahua camera profile management does not work well.
General Camera Mounting Options
Siding Mounting
Mounting Blocks for siding - The Home Depot
Builders Edge 6.625 in. x 6.625 #001 White Triple 3-Surface Block-130110007001 - The Home Depot
– This was recommended for use with the PFA203 wall mount; check link above for other colors, or scroll down in this link to see the other colors available.
Builders Edge 6.625-in x 6.625-in White Vinyl Universal Mounting Block - Lowes
– This was recommended for use with the PFA203 wall mount; check link above for other colors.
Soffit Mounting
See
this video from YouTube user Jim Odell for a great idea on how to use aluminum bar stock to support cameras in a hollow soffit without making holes. Soffits are usually hollow, and therefore may require some sort of wood backing inserted to support the camera. In the newer homes, soffits can be plastic with interlocking joints that snap into place, making it easy to remove to install a piece of backing material for support.
If the soffit material is not easily removable, you can also cut a 4” hole and insert old work ceiling fan boxes, available at
Home Depot and
Lowes, and attach a piece of wood to it that your camera will screw into through the soffit material. Note that most cameras probably cannot mount directly without modification of the mounting locations. If you don’t want to drill a huge hole, or cannot (easily) access the soffit from the attic space, with a traditional wood frame roof construction, a 3” screw may be able to catch part of the wood roof trusses.
Adding More Conduit holes to the Junction Box
If you need more than the two ½” conduit holes provided in the junction boxes, you can use a stepped drill bit (Unibit, i.e.), which make nice clean holes in PVC or cast aluminum. If using ENT (PVC conduit), you can buy a 1/2" or 3/4" solvent weld PVC to EMT (male iron pipe) adapter at all home improvement stores. You use a conventional metal conduit threaded fitting lock ring to secure inside the box, then glue the ENT.
Dahua Camera Accessory & Mount Selection Guide
It is recommended to purchase a junction box / mount from the manufacturer along with your camera, but in case you forget, see what @TonyR built with parts from Home Depot:
Bullet Camera Mounting Box.
Here is the link to a
Dahua accessory selection document, which is useful for viewing which mounts work with the various Dahua cameras. Check this first to see everything available, and below are some details on the popular mounts.
Dahua Camera Mount Details
Dahua Starlight Dome & Bullet Camera Mount Details
PFA130-E ~$16.00 through AliExpress Empire Technology Co., Ltd
PFA137 ~$11.20 through
AliExpress Empire Technology Co., Ltd
This junction box is not waterproof with at turret camera installed on it, as there is still opening around the turret. If you want it to be waterproof, then get the PFA130.
PFB203W ~$16.49 through
AliExpress Empire Technology Co., Ltd
For the HFWxxR-Z series bullet cameras, this box works.
PFA121 ~$25.50 through
AliExpress Empire Technology Co., Ltd
Note that when using one of the above junction boxes and wall mount, the camera “pigtail” connector can be hidden in the mount, only requiring a 3/8” hole in the mounting surface for the Cat 5e cable to pass through. Otherwise, you would need to drill a ¾” hole to be able to pass the pigtail through the wall. It is best to order the mounts when you order the cameras. [note: If Andy is out of stock, check Jimbu on Aliexpress - if you purchase enough they will DHL the shipment.]
Link to Empire Tech's Ali Express Store - Dahua Brackets
Dahua Bracket Mounting Options
This gives you an idea of some possibilities.
Dahua International Model Decoding Chart
Here is the Dahua International camera decoding information, which is different from
Dahua U.S. models.
Dahua International Model Camera Comparison Sheet
While the below information I assembled for some of the favorite Dahua cameras is useful, IP Cam Talk member
@WA3PNT started this
Dahua camera comparison sheet that has more specifications that what is included below.
Dahua Starlight International Camera Model Options (DATED)
NOTE: This section is dated and was last updated in 2018 at the 2MP camera offering. Still great historical and camera information here. Please see this post for the current recommended cameras.
The Dahua 2 MP “Starlight” models with the Sony “Starvis” sensor are highly recommended, with good build quality and excellent low-light performance. Most of the information below is covered in the
Dahua 2 MP Starlight Lineup thread, but see
this particular post by @tangent wherein he updated the links that were broken when Dahua update their website in late 2017.
The products below with the “E” at the end of the model name are Dahua “E-PoE” compatible. Dahua E-PoE is a proprietary PoE standard that allows the power to reach 800 meters over the category cable, if used with Dahua “E-PoE” NVR’s or switches. These models are also compatible with standard PoE power, however.
The varifocal “Eyeball” or “Turret” models are preferred for their versatility and ability to blend in better than the “Bullet” style cameras. The bullet versions are larger, but also have alarm and audio in/out; they also attract more spiders. If you are on a strict budget, you can choose one of the fixed lens “Eyeball” or “Turret” models (they are slightly smaller), but
the prevailing guidance is to spend a little extra for the varifocal models. The varifocal models allow zooming in on the exact desired / required area to be monitored without wasting any pixels.
If budget limitations require the incorporation of fixed focal length cameras, be sure to make use of the
IPVM Camera Locator tool mentioned above. If you have a Dahua varifocal camera, it can be used on-site to determine the appropriate Field of View (FOV) for fixed focal length cameras, see
this post for a visual representation of the Field of View (FoV) differences between lenses.
Recommended Cameras based on DISTANCE to IDENTIFY
Here are my general distance and camera recommendations, but switch out the Dahua 5442 series camera to the equivalent 2MP on the 1/2.8" sensor or equivalent Hikvision works as well. These particular cameras are generally accepted by many here as the best balance of performance day and night, price, and features. With all the cameras I have used and tested over the years, these are the ones I also currently use.
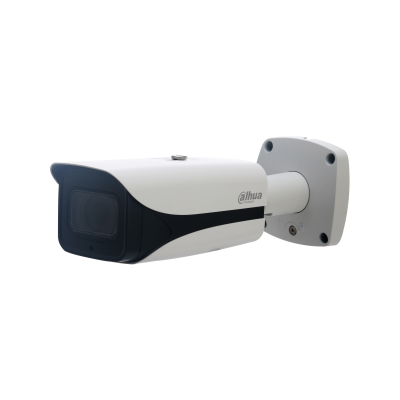
- 5442 fixed lens 2.8mm - anything within 10-15 feet of camera OR as an overview camera.
- 4K/X bullet or 4K/X turret - anything within 10-15 feet of camera OR as an overview camera. The turret versions have a mic and the 4K/X bullet has two-way audio. These cameras need light and cannot see infrared.
- T5449H-ASE-D2 2.8mm fixed lens - anything within 10 feet of camera where the object would be in a backlit condition at night. This camera has two-way audio.
- 5441F-AS-E2 (AKA Boobie cam) or E3241F-AS-M- great choice for a front door camera. The boobie cam can have one lens pointed down for packages. This camera has a mic.
- T5241H-AS-PV - Great little active deterrence camera with two way talk. Good for anything within 10 feet of camera or as an overview camera.
- 5442 ZE or 5842-ZE- varifocal up to 13mm- distances up to 40-50 feet (personally I wouldn't go past the 30 foot range but I like things closer). This camera has a mic.
- 5442 Z4E - varifocal up to 32mm - anything up to 80-100 feet (personally I wouldn't go past 60 feet but I like things closer).
- 5241-Z12E - varifocal up to 64mm - anything from 80 feet to almost 200 feet (personally I wouldn't go past 150 feet because I like things closer).
- 5241-Z12E - for a license plate cam that you would angle up the street to get plates up to about 175 feet away, or up to 220 with additional IR.
- 49225 PTZ - great auto-track PTZ and in conjunction with an NVR or Blue Iris and the cameras above that you can use as spotter cams to point the PTZ to the correct location to compliment the fixed cams.
- Indoors, the IP2M-841 is a cheap common camera choice. Works with Dahua NVR and Blue Iris. Has wifi and ability to use POE with this adapter. Has two-way talk and basic autotracking.
You need to get the correct camera for the area trying to be covered. A wide angle 2.8mm to IDENTIFY someone 40 feet away is the wrong camera regardless of how good the camera is. A 2.8mm camera to IDENTIFY someone within 10 feet is a good choice OR it is an overview camera to see something happened but not be able to identify who.
One camera cannot be the be all, see all. Each one is selected for covering a specific area. Most of us here have different brands and types, from fixed cams, to varifocals, to PTZs, each one selected for it's primary purpose and to utilize the strength of that particular camera.
So you will need to identify the distance the camera would be from the activities you want to
IDENTIFY on and purchase the correct camera for that distance as an
optical zoom.
If you want to see things far away, you need optical zoom, digital zoom only works in the movies and TV...And the optical zoom is done real time - for a varifocal it is a set it and forget it. You cannot go to recorded video and optically zoom in later, at that point it is digital zoom, and the sensors on these cameras are so small which is why digital zoom doesn't work very well after the fact.
Determining fixed focal length requirements using a Varifocal camera on-site
For the mathematical equivalent, forum member tangent provided an algebraic equation to determine the focal length which @mike turned into an easy to use
calculator in the tools section. The equation accounts for variations in the zoom slider range values between Dahua camera lines and firmware releases. Here is the equation:
Value Definitions
Emm = Equivalent lens focal length in mm.
Max = Varifocal Lens maximum focal length.
Min = Varifocal Lens minimum focal length.
SWM = Software adjustment range maximum number.
CS = Current setting number of the software adjustment range slider.
Equation
Emm = (Max - Min) / SWM * CS + Min
Equation Example
Below is a formula example with a Dahua IPC-HDW5231R-Z (
2.7 –
12.0 mm varifocal),
0-1400 slider
adjustment range in the web interface:
Enter the camera values: Emm = (12 - 2.7) / 1400 * CS + 2.7
Solve Max - Min: Emm = 9.3 / 1400 * CS + 2.7
Divide result by SWM: Emm = .00664 * CS + 2.7
Test by setting CS to zero: 2.7 = .00664 * 0 + 2.7
Test by setting CS to 1400: 12 = .00664 * 1400 + 2.7
Varifocal Turret / Eyeball Form Factor Models
Dahua 2MP Starlight Varifocal Turret IPC-HDW5231R-Z Preferred turret as of 1/2018
2.7 ~ 12 mm (f1.4), FOV: H: 97°~34°, V: 52°~20° $169.09 (as of 1/17/18)
Data Sheet | Quick Start Guide | Manual | Review Link | Purchase Link
Dahua 2MP Starlight Varifocal Turret IPC-HDW5231R-ZE Preferred E-PoE turret as of 1/2018
2.7 ~ 13.5 mm (f1.4), FOV: H: 101°~31°, V: 54°~17° $169.09 (as of 1/17/18)
They increased the zoom range slightly, and the look of the front face; it is all glass.
Data Sheet | Quick Start Guide | Manual | Review Link | Purchase Links -
Amazon or
AliExpress
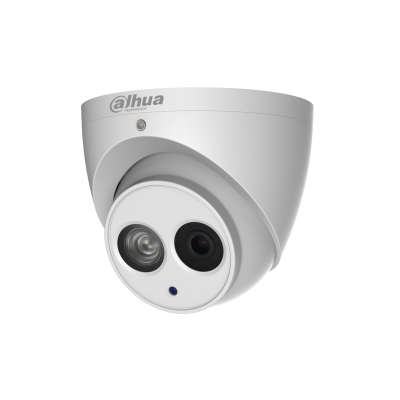
Fixed Focal Length Turret / Eyeball Form Factor Models
Dahua 2MP Starlight Fixed Turret IPC-HDW4231EM-AS Less expensive than Varifocals; 3 lens options.
2.8 mm (f2.0), FOV: H: 110°, V: 58° $127.30 (as of 2/7/18)
3.6 mm (f2.0), FOV: H: 087°, V: 48° $???.?? (Contact Andy)
6.0 mm (f2.0), FOV: H: 051°, V: 30° $???.?? (Contact Andy)
Purchase Link (2.8 mm lens)
Fixed Focal Length Mini Dome Form Factor Models (For shaded exterior areas or interior only)
Dahua 2MP Starlight Mini Dome IPC-HDBW4231F-AS A very small (~4” diameter) “wedge” dome camera that is great for shaded front doors, and it
can be painted to blend in.
2.8 mm (f2.0), FOV: H: 110°, V: 58° $???.?? (Contact Andy)
3.6 mm (f2.0), FOV: H: 087°, V: 48° $119.69 (as of 1/26/18)
6.0 mm (f2.0), FOV: H: 051°, V: 30° $???.?? (Contact Andy)
Data Sheet |
Quick Start Guide |
Manual | Review Link (TBD) | Purchase Link
Amazon(2.8mm lens) or
AliExpress (3.6mm lens)
Dahua 2MP Starlight Mini Dome IPC-HDBW4231F-E2-M/M12 A small (~5” diameter) “wedge” dome
camera with two lenses that is great for shaded front doors to monitor packages and people.
2.8 mm (f2.0), FOV: H: 110°, V: 60° $???.?? (Contact Andy)
3.6 mm (f2.1), FOV: H: 086°, V: 46° $???.?? (Contact Andy)
Dahua Link |
Data Sheet |
Quick Start Guide |
Manual | Review Link (TBD) |
Purchase Link
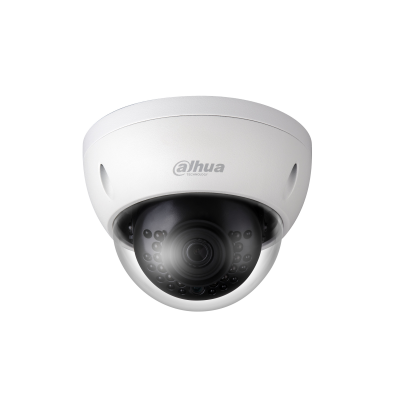
Fixed Focal Length Dome Form Factor Models (For shaded exterior areas or interior only)
Dahua 2MP Starlight Mini Dome IPC-HDBW4231E-AS Less expensive than Varifocals, with 3 lens options.
2.8 mm (f2.0), FOV: H: 110°, V: 58° $124.44 (as of 1/26/18)
3.6 mm (f2.0), FOV: H: 087°, V: 48° $???.?? (Contact Andy)
6.0 mm (f2.0), FOV: H: 051°, V: 30° $???.?? (Contact Andy)
Data Sheet |
Quick Start Guide |
Manual |
Review Link | Purchase Link
AliExpress (2.8 mm lens)
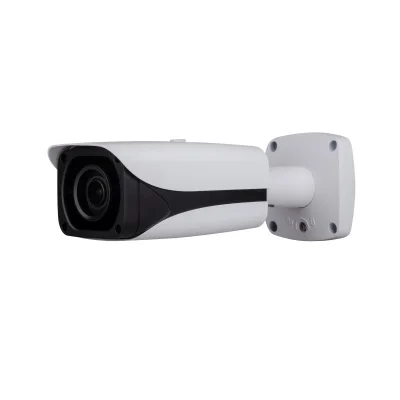
Varifocal Bullet Form Factor Models
Dahua 2MP Starlight Varifocal Bullet IPC-HFW5231E-Z
2.7 ~ 12 mm (f1.4), FOV: H: 97°~34°, V: 52°~20° $192.84 (as of 1/26/18)
Data Sheet |
Quick Start Guide |
Manual |
Review Link |
Purchase Link
Dahua 2MP Starlight Varifocal Bullet IPC-HFW5231E-ZE
2.7 ~ 13.5 mm (f1.4), FOV: H: 101°~31°, V: 54°~17° $182.39 (as of 1/26/18)
They increased the zoom range slightly, and the look of the front face; it is all glass.
Data Sheet |
Quick Start Guide |
Manual | Review Link (TBD) |
Purchase Link
Dahua 2MP Starlight Varifocal Bullet IPC-HFW5231E-Z5 Preferred bullet as of 1/2018
7 ~ 35 mm (f1.4), FOV: H: 35°~12°, V: 19°~7° $197.60 (as of 1/26/18)
Better than IPC-HFW5231E-Z due to greater zoom range
Data Sheet |
Quick Start Guide |
Manual |
Review Link |
Purchase Link
Dahua 2MP Starlight Varifocal Bullet IPC-HFW5231E-Z5E Preferred E-PoE bullet as of 1/2018
7 ~ 35 mm (f1.4), FOV: H: 35°~12°, V: 19°~7° $190.95 (1/26/18)
Better than IPC-HFW5231E-ZE due to greater zoom range, but same zoom and FOV as the “Z5”
Data Sheet |
Quick Start Guide |
Manual | Review Link (TBD) |
Purchase Link
Dahua 2MP Starlight Varifocal Bullet IPC-HFW5231E-Z12 Alternate preferred bullet as of 1/2018
5.3 ~ 64mm (f1.4) FOV: H: 59°~5°, V: 34°~3° $219.45 (as of 1/26/18)
Greatest zoom range of the bullet cameras
Data Sheet |
Quick Start Guide |
Manual |
Review Link |
Purchase Link
Dahua 2MP Starlight Varifocal Bullet IPC-HFW5231E-Z12E Alternate preferred E-PoE bullet as of 1/2018
5.3 ~ 64mm (f1.4) FOV: H: 59°~5°, V: 34°~3° $219.45 (as of 1/26/18)
Same zoom and FOV as the “Z12”, so what changed?
Dahua Link |
Data Sheet |
Quick Start Guide |
Manual | Review Link (TBD) |
Purchase Link
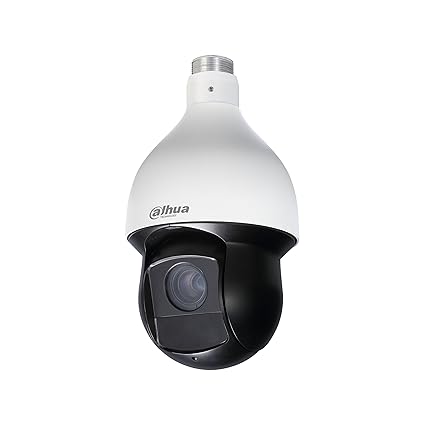
Pan Tilt Zoom (PTZ) Models
Dahua 2MP Starlight PTZ (12x zoom) SD49212T-HN
5.3 ~ 64mm (f1.6 ~ f4.4) FOV: H: 58.2°~ 4.8° $295.45 (as of 3/1/18)
Pan/Tilt Range: Pan: 0°~ 360° endless; Tilt: -15°~ 90°, auto flip 180°
Minimum Illumination: Color: 0.005 Lux @ F1.6; 0 Lux @ F1.6 (IR on)
Dahua Link |
Data Sheet |
Manual |
Review Link |
Purchase Link
Dahua 2MP Starlight PTZ (25x zoom) SD49225T-HN
4.8 ~ 120mm (f1.6 ~ f4.4) FOV: H: 59.2°~ 2.4° $340.00?? (Special Order: Not in store as of 3/1/18)
Pan/Tilt Range: Pan: 0°~ 360° endless; Tilt: -15°~ 90°, auto flip 180°
Minimum Illumination: Color: 0.005 Lux @ F1.6; 0 Lux @ F1.6 (IR on)
Dahua Link |
Data Sheet |
Manual |
Review Link | Purchase Link (Special Order Only?)
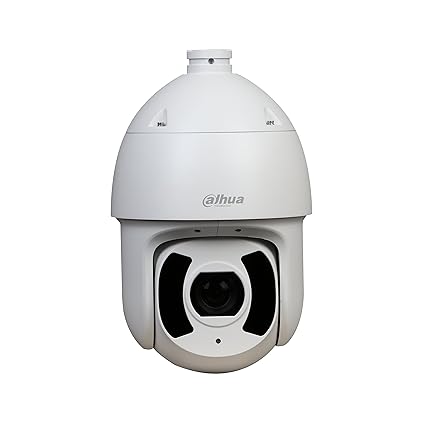
Dahua 2MP Starlight PTZ with Auto Tracking (25x zoom) SD59225U-HNI
4.8 ~ 120mm (f1.6 ~ f4.4) FOV: H: 59.2°~ 2.4° $523.44 (as of 3/1/18)
Pan/Tilt Range: Pan: 0°~ 360° endless; Tilt: -15°~ 90°, auto flip 180°
Minimum Illumination: Color: 0.005 Lux @ F1.6; 0 Lux @ F1.6 (IR on)
Similar to the SD49225T-HN, but
this supports Auto Tracking -
Auto Tracking Demos
Dahua Link |
Data Sheet |
Manual | Review Link |
Purchase Link
Dahua 2MP Starlight PTZ with Auto Tracking (30x zoom) SD59230U-HNI
4.5 ~ 135mm (f1.6 ~ f4.4) FOV: H: 67.8°~ 2.4° $618.44 (as of 3/1/18)
Pan/Tilt Range: Pan: 0°~ 360° endless; Tilt: -15°~ 90°, auto flip 180°
Minimum Illumination: Color: 0.005 Lux @ F1.6; 0 Lux @ F1.6 (IR on)
Similar to the SD49230T-HN, but
this supports Auto Tracking -
Auto Tracking Demos
Dahua Link |
Data Sheet |
Manual | Review Link |
Purchase Link
Dahua 2MP Starlight PTZ with Auto Tracking (25x zoom) SD6CE225U-HNI
4.8 ~ 120mm (f1.6 ~ f4.4) FOV: H: 59.2°~ 2.4° $525.00?? (Special Order: Not in store as of 3/1/18)
Pan/Tilt Range: Pan: 0°~ 360° endless; Tilt: -20°~ 90°, auto flip 180°
Minimum Illumination: Color: 0.005 Lux @ F1.6; 0 Lux @ F1.6 (IR on)
Similar to the SD59225U-HNI, but a different design;
this supports Auto Tracking -
Auto Tracking Demos
Dahua Link |
Data Sheet |
Manual |
Review Link | No Purchase Link (Special Order Only?)
Dahua 2MP Starlight PTZ with Auto Tracking (30x zoom) SD6CE230U-HNI
4.5 ~ 135mm (f1.6 ~ f4.4) FOV: H: 67.8°~ 2.4° $619.39 (as of 3/1/18)
Pan/Tilt Range: Pan: 0°~ 360° endless; Tilt: -20°~ 90°, auto flip 180°
Minimum Illumination: Color: 0.005 Lux @ F1.6; 0 Lux @ F1.6 (IR on)
Similar to the SD59230U-HNI, but a different design;
this supports Auto Tracking -
Auto Tracking Demos
 Dahua Link
 |
Data Sheet |
Manual | Review Link |
Purchase Link
Dahua / Amcrest Indoor Camera
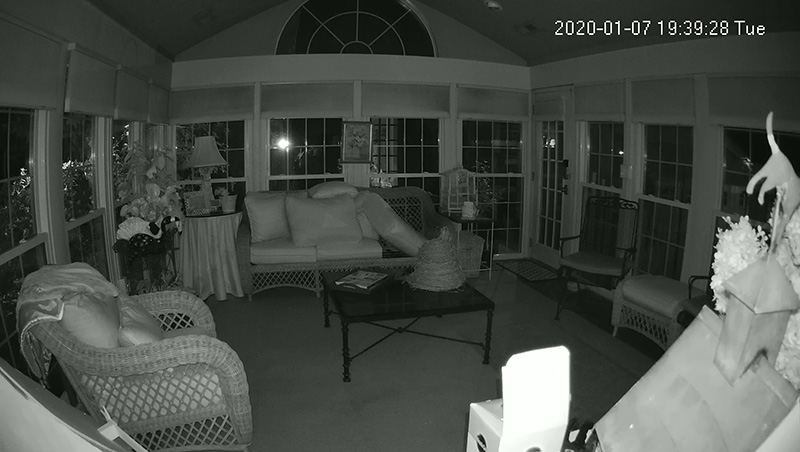
A newer (2020) inexpensive indoor PTZ camera is the Amcrest IP4M-1051B, 4MP wifi camera. Includes 120° FOV, MicroSD slot, is compatible with Blue Iris and more.

Threads
Camera Screenshots
Click each screenshot for a larger view
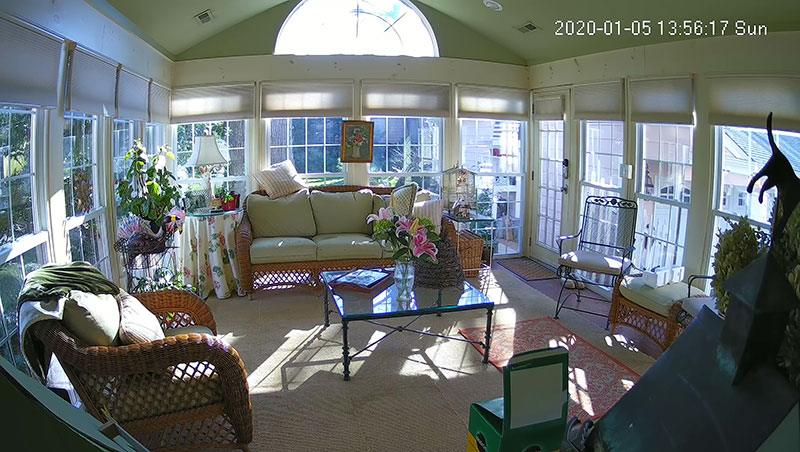
Nighttime
Initial Setup
Amcrest has provided an easy to follow PDF quick start guide, which you can
view here.
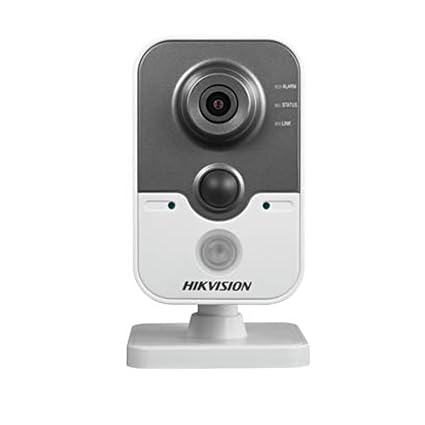
Hikvision Cube Cams / Annke 151DR
If you have a need for a less expensive camera in an indoor location that does not require the low-light performance of a Dahua Starlight model, look at the
Hikvision Cube Cameras. As of March 2019, the original Annke camera discussed here is no longer manufactured. There is a
Hikvision 5MP Cube available in the IPCT Store or by
clicking here.
Initial Setup
The camera is set to DHCP, so search for the camera’s IP address using an IP scanner or log into your router. Once you have the IP address, you would log in using Internet Explorer; the default credentials are: admin for both the username and password. Alternatively, use the Hikvision Search Active Device Protocol (SADP) tool,
available here. SADP allows users to detect Hikvision products on their local area network in order to activate them, change network settings including IP address, Subnet mask, default gateway and port numbers. It also allows them to reset or change forgotten passwords.
Updating Firmware
The English Hikvision firmware can be installed on the camera, as noted in post #18 of the thread; the file links are included in this post. Please note the firmware must be installed in sequential order, as Hikvision firmware updates are file-based, and generally depend on the previous firmware. Upgrading the firmware is recommended due to the backdoor vulnerabilities that Hikvision fixed in this camera. You can upgrade by using IE 11 (run as admin) or with IVMS-4200, linked above. Can’t see the files you downloaded with IE 11? Then start reading from this post. Once you upgrade to the Hikvision firmware, if you still see the Annke banner, clear your browser cache.
Mounting Options
The included mount is for horizontal and vertical mounting situations, and the post can also be taken apart at the "wing” nut. The camera also has a ¼-20 threaded female fitting on the back (tripod compatible).
LAN Connectivity Information
Some users reported the LAN and Wi-Fi devices inside the camera have the same IPv4 addresses, and some reported there were unique addresses in each. Disable the connectivity interface (LAN or Wi-Fi) you are not using to connect to eliminate any potential connectivity issues. Also ensure the subnet mask and default gateway are correct for the interface you intend to use.
Setup Tips
If you want to utilize the event logs, install a Micro SD card (any size) in the camera.
IR light – To turn off when in night mode, the setting location depends upon the firmware used: Annke firmware: Advanced Configuration => System => Service => Enable IR light (clear the check box) Hikvision firmware: System => Maintenance => System Service => Enable IR Light (clear the check box)
Two-way Audio – In the camera interface, under the Video section, ensure that “Video & Audio” is selected, and the audio codec selected is “G.711ulaw”.
Blue Iris Tips
In order to enable the camera PIR for use in Blue Iris, you must enable PTZ, and use a separate alarm output tab that needs to be enabled on the camera. This is not intuitive, so see
this post for details.
To ensure two-way audio works, in the Camera Properties -> Video --> Configure Network IP, select Make: Hikvision, and Model: One of the 2 RTSP choices. Some users reported that using a generic make did not enable the audio.
Mobile App Tips
IP Cam Viewer works with two-way audio using [Make: Hikvision Model: Hikvision IP Camera (active-x)], according to
this post. TinyCam Monitor Pro users should select [Vendor: Hikvision], [Model: DS2CD2012-I], to enable two-way audio, according to
this post.
Installing Outside
Given the Operating Conditions noted in the specifications [-30 °C ~ 60 °C (-22 °F ~ 140 °F) Humidity 95% or less (non-condensing)], this camera can be a solution for covered porches. One owner used this
$26.74enclosure to install this camera outdoors in the elements; see this post for his experience.
Installing Other lenses
@alastairstevenson installed an f2.0 lense, and was happy with the performance results. The aesthetics,
maybe not so much; see
this post.
Doorbells
Dahua / Amcrest Doorbell - AD110
The
Amcrest AD110 is newer than the Hikvision mentioned below, has 2-way audio, MicroSD, RTSP, Blue Iris Compatible and more. It is also confirmed to work with Blue Iris.

Threads:
HikVision DS-KB6003-WIP – A Promising Doorbell Camera
Threads:
Released in September, 2017, this HikVision DS-KB6003-WIP 1080p doorbell camera is being re-branded and sold by the following: Clare, LaView, LTS (thread link above), Nellys Security (thread link above), RCA, and Uniden for around $199 retail. The actual Hikvision model was initially hard to find, according to
this thread, but seems to be available on eBay now.
Some sales near the end of 2017 dropped the price to $129 and $99 (Black Friday). The unit works with Blue Iris or a HikVision NVR. While not a real security camera, it may be useful as a sole front door camera / intercom if you are unable to wire for a camera at your front door.
Noted issues – Very bad IR flare / glare at night; there are currently no options in the firmware to disable IR. There are also
reports of Wi-Fi connectivity issues: Sometimes these were related to low power from the doorbell transformer (replace it) or the use of an electronic doorbell chime (install a mechanical chime or an interface board). Others have opined the Wi-Fi radio in the camera has poor reception, despite a strong Wi-Fi signal at the installed location, which causes link speeds to occasionally drop to 1 Mbps.
Here is one example how this may be solved by installing a Wi-Fi repeater near the installation location. Read through the threads if any of these noted issues are concerning.
Some purchase links
Dahua NVR Information
Note: These do not come with hard drives.
Dahua 4K 8/16/32 Channel (Non-PoE) Network Video Recorder (
Requires you to provide PoE power sources)
Dahua 4K 16/32 Channel (PoE) Network Video Recorder
PoE vs Non-PoE NVR’s
Infrastructure
A PoE NVR requires cables from each camera to the NVR. With a non-PoE NVR, the PoE switch(es) can be installed closer to the camera locations, with shorter cable runs for reduced power loss vs longer cable runs. Also, if your NVR is stolen, separate PoE switches will still provide power to the cameras, and if you have on-board storage installed, they will still be recording.
Camera Access
A PoE NVR will automatically create a separate network (subnet) for your IP cameras, which is a good security practice.
This increases the difficulty accessing the camera configuration directly; the computer will have to be set to the same subnet as the cameras, as detailed
here. However, you can configure many of the camera settings using a GUI directly from the NVR, but some setup items (i.e. formatting & setting up an on-board Micro SD card) require direct camera access. With a non-PoE NVR, it is easier to access each camera for configuration, as everything is on the same subnet, but the cameras are also exposed to the internet, and should be secured.
Ease of use
A PoE NVR is a simple plug-n-play setup, but is also less flexible and harder to work with. Some of the Dahua PoE NVR limitations are: No virtual hosts, no direct way to connect to the cameras, some camera setup options are not accessible like, zoom level, local Micro SD card, advanced exposure settings, etc., and the inability to use NTP timesync. In short, a non-PoE NVR is best for tweakers.
NVR GUI Management
Dahua offers free software called Smart Professional Surveillance System (SmartPSS) for managing and viewing cameras and NVR recordings; it is a good option, and can be downloaded
here, and an excellent in-depth tutorial can be viewed
here. You can also connect directly to the NVR's web interface from a computer, or connect a mouse directly to the NVR and use a connected display to manage it.
Event Triggers
Dahua features Intelligent Video Systems (IVS), which and is an event triggering system (intrusion, tripwire, abandoned object, missing object, etc.). The signal is a proprietary command and connection methodology between the camera and NVR, so it only works with Dahua NVR’s.
Firmware Updates
Dahua does not document and post firmware updates sufficiently, however IPCT has a
downloads section with some available firmware.
Dahua NVR Vulnerabilities (9/25/2017)
DAHUA RECORDERS HACKED
Past Dahua NVR IVS Issues Solved by 2017-04-18 NVR firmware, as noted in
this thread.
There used to be issues with random reboots after IVS trigger events, as detailed here, and with how Dahua NVR’s handled the recording of IVS events, but these issues were reportedly fixed in an April, 2017 firmware update. Below is information on the solved NVR Recording issue, as confirmed here:
The NVR makes separate recordings for these clips, but, there are 1-2 seconds of skipped audio/video at the beginning of these clips. It is a problem with the way Dahua implements their event recording algorithm in all their IP cameras and NVR’s. Unless Dahua changes how they record (and start new video files when the camera sends an iframe), I don't think this can be fixed. Alternatively, use one of the work-arounds mentioned in this thread, some of which are mentioned below.
Work arounds include reducing the maximum time of the gap down to one second by changing (on the camera) the iframe interval to match the value of your FPS. By default, the camera's iFrame setting is 2x FPS, which means you can have to up a maximum of a two second gap. Another option is to turn off event video recording, keep continuous recording, and store a jpeg snapshot on event triggers (ivs, motion, etc.). This provides a time line of events you can look at when scrolling through the video recording.
When recording continuously, you can also filter by event duration: Go to Setup -> Information -> Log, then search for event only, and you will see a list of all the events by time and date. With begin and end time, I can find events that have a longer time-frame that may be worth checking, as the shorter time-frame events are mostly false triggers. This is one method I used to check events on cameras that I don't wanted to be alerted by unless I suspect some suspicious activity occurred.
Dahua NVR Fan Modifications
The fans inside the NVR can be loud; this is subjective and dependent upon the installation location and its proximity to people. The DVR’s have two fans: One 40 x 40 x 10 mm exhaust fan for the case (on the left side), and one 40 x 40 x ?? mm exhaust fan on the power supply (on the rear).
Here is a thread detailing two examples of case fan and heatsink modifications with Noctua fan installations. No users have yet reported replacement of the power supply fan.
Blue Iris Information
Be sure to check the
Blue Iris Wiki section. You are encouraged to
purchase Blue Iris here on IP Cam Talk.
Blue Iris has advanced motion detection, but can also support in-camera motion detection from cameras supporting ONVIF. Read about using Dahua IVS in Blue Iris in
this thread. Note that
on older firmware, IVS events may not be available in Blue Iris.
Minimum System Requirements
- Pentium dual-core or equivalent 2GHz processor or better, but it must have Intel® Quick Sync
- 2GB or more system RAM
- Microsoft Windows XP SP3 or newer, or a server OS
- One or more USB or Network IP cameras, or an analog capture card with DirectShow drivers
- Recommendations when using many and/or HD cameras:
- Intel core i7 with QuickSync for hardware decoding
- 8GB or more RAM
- Microsoft Windows 8.1 or 10, 64 bit
- nVIDIA graphics adaptor for efficient screen display
- 7200+ RPM drives and/or SSD drive
Helpful thread:
Computer for Blue Iris
General Blue Iris Tips
Be sure to check the "
Choosing Hardware for blue Iris" wiki page before continuing.
Blue Iris Hardware Tips
Monitor Blue Iris CPU usage, and keep it below 100% under normal circumstances, so there is headroom for other functions, i.e. remote viewing, clip exports, Windows defender (ugh), etc... Recompressing video is very CPU intensive, and Blue Iris’ “Direct-to-disk” (Camera properties > record > file format) recording does not recompress video; it maintains original video quality and reduces CPU usage. This feature requires an Intel processor with Intel Quick Sync.
Further reduce CPU load by reducing the camera's frame rate to 10-15 FPS, 4096 bit rate, and the image quality setting to 4 in the camera web interface. Go into Blue Iris Options > Cameras tab (same place the hardware acceleration option is) and limit the live preview rate to ~10 FPS to reduce your CPU usage. This setting is important for optimal performance, as Blue Iris is really slow at drawing video on screen.
Blue Iris Performance Tips
Be sure to check the "
Optimizing Blue Iris' CPU Usage" wiki article before continuing.
- Use a computer dedicated only to BI.
- If running BI as a service and the admin window is also open, it doubles the CPU requirements.
- Using Remote Desktop to view the admin window also additional requires additional CPU resources.
- Don’t duplicate camera profiles in BI; you can record continuously and trigger motion alerts from the same camera setup, and export any portion of a clip.
- Use “Direct-to-disk” (Camera properties > record > file format)
- Turn on the Intel hardware acceleration (Options > Cameras > Item 4)
- Turn off time, text, and graphic overlays in BI (use the camera’s) to avoid additional post processing. Camera Settings > Video > Text and Graphic Overlays, "Edit"... select the time stamp and delete.
- Exclude blueiris.exe and the folders from your antivirus program (see help in bi for more details).
- Monitor other processes (windows task manager-all users) to see what else is using CPU resources. Windows defender is a CPU hog in Windows 10, so consider permanently disabling it, as shown here. Also, sometimes web browser plugins don't shut down as they should.
Blue Iris Server with Dual LAN
Concept & Configuration
Similar to the way Dahua NVR’s use a separate subnet for the cameras, you can set up a Blue Iris computer the same way by using two network interfaces. If the motherboard on the computer does not have dual LAN interfaces, and there is a spare PCI-E slot, just get an additional Network Interface Card (NIC),
like this one. Use one of the network interfaces for your secure LAN, and the other one for the non-secure camera LAN. The Blue Iris PC needs to have access to Ethernet cables for both of the secure and non-secure networks, on different subnets; i.e. 192.168.1.X secure, and 192.168.0.X non-secure. Just make sure the two subnets share the same subnet mask, like 255.255.255.0.
The non-secure network would connect to the PoE switch w/all your cameras. The cameras should be configured with static IP addresses, and no gateway, so they cannot access the internet. Alternatively, establish firewall rules that prevent the cameras from directly accessing the internet and the secure LAN subnet. With this configuration, only the Blue Iris server will be able to access both the (secure) LAN and the (non-secure) camera network. Note the trick is to leave the gateway address blank for the non-secure LAN NIC settings in the Blue Iris server; only the secure LAN NIC will have a gateway address.
The Blue Iris computer acts as the time server for the cameras, and the cameras point to the server’s non-secure LAN IP address (i.e. 192.168.0.X secure). To allow the communication from the cameras to the time server IP address, set a rule on any firewall used on the Blue Iris server to allow port 123/UDP to pass through the firewall of the non-secure network. IPCamTalk user @DognamedTank recommends using the NTP server built into Windows 10;
see setup guide here.
Viewing Cameras Remotely
While a physically segmented network as described above is an excellent security practice, accessing the camera web interface is more challenging. You can use Google Remote Desktop to view the Blue Iris computer without having to forward port(s) in the router. The Blue Iris computer can be used to view individual cameras, as well as clips and videos saved. You can also use Google Remote Desktop to log into the cameras separately via the web interface, for configuration purposes. All this is possible because Google Remote Desktop is a connection to the desktop of the computer that has access to both the (secure) LAN and the (non-secure) camera network. Google Remote Desktop, TeamViewer, and similar software do NAT traversal by keeping a connection active to a remote server that can be used to connect to your computer, just like he P2P function on many cameras. Unfortunately, using a remote desktop application will significantly increase CPU utilization, so don’t leave it connected full-time.
Viewing Cameras at Home
If you want to log into the web interface of your camera without using Google Remote Desktop, use the Blue Iris computer that has access to both the (secure) LAN and the (non-secure) camera network. Alternatively, use the “Remote Desktop” apps native to both Windows and OSX. From a security perspective, it would not be a good idea to use a computer temporarily connected to the (non-secure) camera network, as it defeats the purpose of having separate networks.
Blue Iris Remote Viewing Options
Mobile Applications
https://ipcamtalk.com/threads/what-apps-do-you-guys-use-to-access-your-cameras.30/
Blue Iris Mobile app to access Blue Iris for recordings, etc., but I also use IP Cam Viewer Pro.
On Android, TinyCam works well for live view only.
Blue Iris Remote View Live Page
As an alternative to the mobile apps and the built-in Blue Iris web interface, IP Cam Talk user
@bp2008 made
Blue Iris UI3, a custom remote viewing solution. This can even be installed on Android OS devices; see how Matthew Hudnall
installed it on his Amazon FireTV.
HDD Recommendations & Information
Check out the
HDD calculator here to help figure out what size hard drive you should purchase.
WD Purple drives are recommended for either the Dahua NVR’s or a Blue Iris setup; buy the largest capacity you can afford. The Dahua 5216 NVR max size is listed at 12TB (2x6TB), but
larger drives do work, so
there is no size limit. Estimate about 1.25 TB per camera for 30 days of recording, but usually, 10 days of history is enough for an incident.
There are so many factors that affect the storage: Compression codec, resolution, number of sub streams, FPS, bit rate, audio, audio codec, audio sampling rate, humidity, etc. Here is an example setup with 30 Days of history for 6 cameras:
NVR5216
(2x) 4TB WD Purple (8TB)
(6x) Cams at 1080P Main Streams in H.265 / 20 FPS / CBR at 4096 / G117a Audio at 16K
3 recording 720P Sub Streams in H.265 / CBR at 2048 / G117a Audio at 8K
3 recording D1 Sub Streams in H.265 / CBR at 1024 / G117a Audio at 8K
Humidity at 50%
WD Purple 4TB Surveillance Hard Disk Drive - 5400 RPM Class SATA 6 Gb/s 64MB Cache 3.5 Inch - WD40PURZ - $116.79 (3/13/19)
WD Purple 6TB Surveillance Hard Disk Drive - 5400 RPM Class SATA 6 Gb/s 64MB Cache 3.5 Inch - WD60PURZ - $184.88 (3/13/19)
Micro SD Card Recommendations & Information
Forum member @nayr recommends Samsung EVO+ (rebranded to EVO Plus in 2017), and records continuously to SD storage as a backup to utilize the Dahua NVR Automatic Network Recovery (ANR) feature; this retrieves any lost data the cameras may contain after an NVR outage. Note, this doesn’t work with Blue Iris; you would need to pull the footage using the web interface. If using Blue Iris, you can have the camera only record to the MicroSD card only on motion, which will save space and extend the life of the card.
Dahua 2 MP cameras use ~9+ Mbps with h.264, and ~5+ Mbps with h.265; here are some estimates for full-time recording capacity:
For h.264@ 5736 Kbps (Max bitrate for 10 FPS), 32 Gb = ~12 hours, 64 Gb = ~24 hours, 128 Gb = ~48 hours.
For h.265@ 5736 Kbps (Max bitrate for 10FPS), 32 Gb = ~24 hours, 64 Gb = ~48 hours, 128 Gb = ~96 hours.
Amazon Purchase Links –
Watch out for counterfeit sellers!
Samsung SDXC 64GB Class 10 UHS-1 Memory Card w/ Adapter, (MB-MC64DA/AM) – (~$22)
Samsung 128GB EVO Plus UHS-i Class 10 Micro SDXC Card with Adapter up to 80MB/s (MB-MC128D) – (~$28)
MicroSD card installation on cameras can be tricky,
as noted here for a Dahua 4231emp-ase camera.
PoE Switch and Injector Recommendations
Visit this link to see a fairly comprehensive PoE Switch Suggestion List:
https://ipcamtalk.com/threads/poe-switch-suggestion-list.23070/
The amount of options here can be intimidating, so download the document and sort it to prioritize your needs to make it more manageable. If you plan to have a lot of PoE cameras or PoE devices one of the cost-effective options may be getting a used PoE/PoE+ switch from ebay. These are typically managed switches that businesses offload on eBay once the warranty expires. A managed PoE switch allows network segmentation of various devices, if desired.
One thing to be aware of is the difference between Passive PoE and Active PoE. Here is an edited excerpt from discussion
here: The difference between passive and active PoE is the auto negotiation, mitigating the need to think about what you plug in. Active PoE devices do a handshake between the Power Supplying Equipment (PSE) and the Powered Device (PD) before it turns on the power, whereas Passive PoE is always on. 802.3af/at based end devices expect the power sourcing equipment to provide certain protections the "passive" 48V PoE doesn't provide.
External IR Light Recommendations
When the in-camera IR illumination is not optimal, consider using external IR illumination. 850-nm IR emitters glow red and provide useful IR illumination for security cameras. 940-nm IR emitters do not provide as much useful illumination for security cameras, but are not visible to the human eye. IR lights attract bugs, and hungry spiders.
Here is an example video of IR use; note this particular product link is no longer available, but you can find similar products by searching, or see the recommendations below from other forum members. The Dahua 5231's IR lights have a narrow beam angle, impacting night vision at wider camera angles. Below are some external IR illuminator recommendations.
4-LED, 12 VDC/12 W IR light $11.99 (3/26/18); 12VDC/1A, 850nm, 90° beam angle, 65’ (19.8 m).
6-LED, 12 VDC/12 W IR Light $20.99 (3/26/18), 12VDC/1A, 850nm, 90° beam angle, 65’ (19.8 m).
User report: More like a concentrated spot light.
To power the above lights, you can use a separate low-voltage power supply adapter, or a
PoE+ splitter likethis one to break the power out of the Ethernet cable, and then
this Y connector to power the camera and the light simultaneously.
The IPC-HDW5231R-Z camera uses <8.5W, and the lights referenced above require 12W, so 20.5W total power is required from a PoE power source. Therefore, only a PoE+ Injector / NVR / Switch and a PoE+ splitter/adapter will have enough power for both the camera and these IR lights.
The IEEE
802.3af PoE standard provides up to 15.4 W of DC power on each port. The IEEE
802.3at PoE+ standard provides up to 25.5 W of power on each port. The 24-watt models below cannot be paired with a camera and powered via PoE, and require a separate power adapter, so ensure they come with it.
12-LED, 12 VDC/24 W IR Light $29.99 (3/28/18) 12VDC/2A, 850nm, 90° beam angle, 100’ (30.4 m).
18-LED, 12 VDC/24 W IR Light $42.99 (3/28/18) 12VDC/2A, 850nm, 90° beam angle, 120’ (36.5 m).
18-LED, 12 VDC/24 W IR Light $45.91 (3/28/18) 12VDC/2A, 850nm, 90° beam angle, 150-200’ (45-61 m).
These IR lights are made for ghost hunters; a forum member reported they will also
make custom units.
Affordable PoE-powered IR Lights – No Adapters Required
In the second post of
this thread, @jaycanter noted there are affordable
IR Lights from
Austin LED Consultants that are
powered directly via PoE. This setup with a 6-watt IR illuminator $49.95 (3/26/18) uses both Mode A PoE power (from your 802.3af PoE switch) and Mode B PoE power (from the included power supply) to power to both a PoE camera and the PoE IR Light
over a single cable. Note the post whereby it was stated this is an IR spot light, not a wide-area flood; I was not able to locate the beam angle specifications.
The company offers both white light and IR light models that use a either a single Category cable for power (Mode A), and a single Category cable to power both the light (Mode B) and a camera (Mode A). Unfortunately, the data sheets for the
Mode A and
Mode A + B versions do not provide flood beam angles.
The Ultimate? PoE-powered IR Lights – No Adapters Required
The manufacturer
iluminar makes quality, DC and PoE-powered IR & White Light illuminators in both 850nm and 940nm
with specific beam angles per model (10°, 30°, 60°, 100° & 120°): The illuminator can be matched to a scene and camera lens focal length, allowing
possible coverage of various use cases with greater accuracy than the models noted above. The product pages for their
Invisible Series (IR), and their
Visible Series (White Light); each includes a wide range of sub-categories.
The Series II IR PoE product documentation is located
here. While expensive, they use high-quality Surface Mount Technology (SMT) LED’s and powder-coated aluminum extrusion enclosures; beautiful products!
The IR148-PoE-2 series data sheet notes a maximum distance of 115’ (35 m) with a 10°beam angle model, as
well as this model, with comparable beam angle to the models from Amazon noted above:
4 SMT LED, 802.3af PoE 12W IR Light $262.50 (3/13/19) 802.3af, 12W, 850nm, 100°H x 50°V beam angle, 40’ (12 m) distance.
The IR312-PoE-2 series data sheet notes a maximum distance of 312’ (95 m) with a 10°beam angle model, as well as this model, with comparable beam angle to the models from Amazon noted above:
8 SMT LED, 802.3at PoE+ 24W IR Light $532.95 (3/13/19) 802.3at, 24W, 850nm, 100°H x 50°V beam angle, 80’ (24 m) distance.
The Opto series from iluminar offers more affordable DC and PoE powered lights, sometimes without the high-quality Surface Mount Technology (SMT) LED’s. Here are the product pages for the
Opto Infra Red and
White Lite product categories; each series includes a wide range of sub-categories.
The DC (not PoE) powered
IRC99 Series has pricing much closer to the Amazon listings above, like this model:
55-LED, DC 24W IR Light $61.95 (3/13/19) 12/24VDC/24W, 850nm, 80° beam angle, 66’ (20 m).
The DC (not PoE) powered
IRC182 Seriespricing increases due to more LED’s, like this model:
147-LED, DC 42W IR Light $121.95 (3/13/19) 12/24VDC/42W, 850nm, 120° beam angle, 66’ (20 m).
The DC (not PoE) powered
IRC300 Series pricing increases due to increase range, but there is only one model:
15-LED, DC 42W IR Light $148.95 (3/13/19) 12/24VDC/42W, 850nm, 40° beam angle, 66’ (20 m).
The PoE powered IRC132-PoE Series is less expensive than the IR148-PoE-2 series, due to fewer SMT LED’s, shorter range, and a different case design. The data sheet notes a maximum distance of 132’ (40 m) with a 10°beam angle model, as well as this model, with comparable beam angle to the models from Amazon
noted above:
6 SMT LED, 802.3af PoE 12W IR Light $187.95 (3/28/18) 802.3af, 12W, 850nm, 90° beam angle, 26’ (8 m).
The PoE powered
IRC200-PoE Series adds more SMT LED’s to increase the range, requiring a PoE+ power source. The
data sheet notes a maximum distance of 200’ (60 m) with a 15°beam angle model, as well as this model, with comparable beam angle to the models from Amazon noted above:
12 SMT LED, 802.3at PoE+ 24W IR Light $291.95 (3/13/19) 802.3at, 24W, 850nm, 90° beam angle, 50’ (15
Dahua IPC-HDW5231R-Z / E-Z5 / E-Z12 Details
Weatherproofing Connections
Most IP cameras come with connectors similar to this, so this is not exclusive to Dahua products.
The included RJ-45 waterproof connector is OK, but it can be improved with Di-Electric grease in the connections:
Permatex 22058 Dielectric Tune-Up Grease, 3 oz. Tube | Amazon, as well as wrapping the end with self-sealing silicon tape:
Scotch Linerless Rubber Splicing Tape 130C, 3/4" Width, then finally wrap it with either black or white electrical tape:
Scotch Super 33+ Vinyl Electrical Tape, 3/4 in x 66 ft, black or
Scotch Vinyl Color Coding Electrical Tape 35, 1/2 in x 20 ft, white.
Duct Seal is useful for sealing any holes or gaps in the junction boxes, as well as sealing conduit holes.
You can find RJ-45 waterproof connectors on Amazon and ebay, but these require you to cut the camera’s
connector, and it Dahua doesn’t appear to have standardized wire colors, as noted
here.
CNBTR LAN RJ45 AP Female to Female Adapter Waterproof connector M25 Ethernet | Amazon
Waterproof Connector Installation
Keep the convex groove outward and install the rubber ring into the network port, keep the smaller hole of the rubber ring outward and install the fixing rubber ring into the main body of the waterproof connector.
Set Screw Info
If you drop one and can’t find it: The size is #10-32 x 3/8",
A 2-pack was $0.90 at my local Home Depot
Dahua Camera Best Practices
Inspired by this post
Cameras infected with malware can cause issues when attempting firmware updates, so
connect the camera directly to your PC and disable the internet connection before applying updates. For installed cameras where direct connection to your PC is not possible, disable your home internet service while updating. If you have issues accessing the camera web GUI, but it responds to pings, malware is probably blocking connection attempts. Strictly adhering to the instructions below might help regain access. If you think the camera is bricked, try following the instructions in
Dahua IPC EASY unbricking / recovery over TFTP.
While you may find firmware releases posted, it is suggested to fully research potential issues, and ask on the forum before applying an unknown release.
Before applying a firmware update, ensure you save the camera configuration. After applying a firmware update, ensure factory default (reset) the camera in the Web UI (Setup > System > Default), and then reload the saved camera configuration. Disable auto reboot in Setup > System > Auto Maintain.
It is good practice to prevent the cameras from connecting to the Internet, either via DMZ / UPNP / Port forwarding in the router, as it can cause issues with too many connection attempts from the Internet, especially if they have malware.
To temporarily disable the internet connection in the camera UI, set a false gateway IP address in Setup > Network > TCP/IP. Attempting to leave the field blank will cause an error message when trying to save, so
enter an IP address outside the DHCP range to avoid IP conflicts. This should only be a temporary situation until the proper firewall rules are established to limit / prevent camera access to your LAN and internet.
Block the camera IP / MAC address in your router firewall rules. The cameras should only communicate with the local LAN and/or the VPN LAN, if your router is set up as a VPN Server. For some limited internet access, also use the router firewall rules, ensuring they are in the proper order. If you allow email and/or NTP time server communication, put that rule above any “block all traffic” rule. Firewalls stop processing rules when it finds the first one it encounters.
Also consider blocking easy4ip in your router, as it ignored being disabled in the camera prior to the 2017
firmware release.
Dahua Camera Initial Setup
Preparation – Before Disabling The Internet Connection
If using a password manager, generate the random password while you have an internet connection; you will copy and paste it in step 6. Access any links in the instructions below you may need, and download any researched and vetted firmware you may wish to install. The international model cameras can accept either NTSC or PAL firmware.
Disable The Internet Connection On the Computer
Take note of your internet adapter settings so you can revert back after the camera is set up. Disable the internet connection on your PC/Mac by removing the Gateway IP address. If the PC/Mac is on a different subnet than 192.168.1.x, you need to change the IP address to 192.168.1.100, and the Subnet Mask to 255.255.255.0 as detailed
here.
Apply power to the camera
a.
Via PoE: Use a PoE Injector / Switch to interconnect the computer and camera via Ethernet cables. Be careful, as some PoE devices do not use auto-sensing ports to detect whether or not a device is PoE compatible, so it is possible to damage the computer.
b.
Via a power supply: Connect a 12V/1A power supply with a 2.1 diameter x 5.5mm long barrel connector to the camera power connector, and connect the computer and camera via Ethernet.
Log Into The Camera and change the default password
a.
Using a web browser: Go to
http://192.168.1.108, login with username: admin, password: admin. After logging in, the UI opens a page where you can change the default password.
b.
Using the
Dahua ConfigTool: Search for the camera, then go to System Settings > Password.
a.
Note this no longer works on firmware from late 2017, as an extra security measure.
Dahua cameras have two different "admin" accounts; one for "ONVIF", and one for "users" logging into the camera. The above process may only change the “user” account. The ability to change the “ONVIF” admin account in the camera web interface was added in the latter part of 2017 firmware releases, in a separate “ONVIF User tab under Setup > System > Account. If this doesn't appear in the camera Web UI, use Dahua’s
ONVIF Device Manager tool to manage it, along with these instructions (For Step 1, use the default “admin” password).
It is worth checking to verify and correct the ONVIF password. For optimal security, set different passwords for the "ONVIF", and "user" admin accounts.
Change Network Settings
a.
Using the
Dahua ConfigTool: Go to Modify IP=>IP Modification
b.
Using a web browser: Go into Setup > Network > TCP/IP, and configure the settings for your LAN
Set a static IP Address, and prevent the camera from connecting directly to the internet by setting a false gateway IP Address outside the DHCP range. This should be corrected after establishing the firewall rules as noted below.
Record the MAC address listed, as it may be different than the camera mount sticker. Save the settings, power-cycle the camera, and re-connect it to your LAN.
Re-Enable The Internet Connection On the Computer
Revert to the initial settings noted in step 2 above.
Establish Firewall Rules
Establish firewall rules in the router to prevent the camera from accessing the internet via the MAC address recorded in step 6. Each router will differ in the specific instructions, so use Google.
Using The Dahua ConfigTool
If you experience difficulty using the
Dahua ConfigTool, the below guidance may provide some assistance. The default IP address of all Dahua cameras is 192.168.1.108, regardless of your LAN IP Address range. The tool is useful for initial network discovery and for changing the network settings; it can be
downloaded here. Here is some guidance, inspired by @looney2ns
Launch the ConfigTool. If no cameras are found, click on “Search Setting”, and in the window, enter:
Start IP: 192.168.1.1 (or an IP Address range compatible with your home network)
End IP: 192.168.1.255 (or an IP Address range compatible with your home network)
Username: admin
Password: admin
Click “OK”, then click the big blue circle with two arrows at to the left of "Search setting".
To modify camera settings, click the green pencil icon (IP Modification) to change the IP address to one compatible with your home LAN. Once the camera reboots, it can be reached by your computer, so launch a browser, navigate to the camera IP address, and change the default password.
Dahua Camera Viewing Options – Computer / Laptop
Accessing The Camera Live View Interface
Any web browser will work for accessing the setup menus, but accessing the “Live” and “Playback” views is more problematic. Live view is useful while adjusting settings that affect image quality or for setting up motion detection, IVS, etc... Dahua offers free software: The Dahua Smart Professional Surveillance System (
Smart PSS) is useful for setup with access to the “Live” view, as well as for managing / viewing camera and NVR recordings: It can be
downloaded here, and an excellent in-depth tutorial can be viewed
here.
The suggested browser option for accessing the “Live” view interface is the
Pale Moon x86, 32-bit browser; the x64, 64-bit version does not work with plug-ins. Users report consistent results with Pale Moon and the NPAPI plug-in, but it is not immune to issues. The plug-in installation prompt may reappear after browser or plug-in updates. When encountering plug-in issues, or if prompted, reinstall the plug-in and then force close and restart the browser to get it working again
Firefox, IE, Pale Moon, and Safari: Use NPAPI plug-in.
Chrome: Use the Native Client (NaCL) Web Plug-in;
Once installed, to open up the NacL plug-in, go to a new tab and select Apps on the Bookmarks Bar.
This will soon be removed in Chrome version ??.
Using the IE Tab extension for Chrome is not recommended due to security vulnerabilities.
Dahua Camera Viewing Options - Mobile Devices
https://ipcamtalk.com/threads/how-to-view-dahua-cameras-with-smartphone.16394/
gDMSS Lite - Android Apps on Google Play
gDMSS Plus - Android Apps on Google Play
iDMSS Lite on the App Store
iDMSS Plus on the App Store
The plus versions are most useful if you have a Dahua NVR and want to use the push notifications, which can be more useful than email notifications. Also check out the VPN Primer for Noobs
IP Cam Viewer Lite seems to be a good, free, stable app.
On Android, TinyCam Pro works well too. If you turn on "Low Bandwidth Mode", it will correctly pull the sub stream, required for viewing outside of the LAN. Apparently, the channel setting actually changes the channel number on the URL and not the subtype setting. Low bandwidth mode correctly changes the subtype to the sub stream.
How to Setup Push Notifications on the IDMSS Mobile Application
https://dahuawiki.com/Mobile/iDMSS_Push_Notifications
This is the paid "PLUS" version for IDMSS (IoS, $4.99) / GDMSS (Android, $4.99). For push notifications to work you must have "Event/Motion" and or "Alarm" enabled from the "Device Manager" in the main menu of IDMSS/GDMSS paid application. Follow the step by step instructions below to setup push notifications.
Dahua Camera Factory Default
If it is necessary
https://dahuawiki.com/ResetIPCamera
While the pictures in the link above are not very good,
here are some great photos, courtesy of @Tizeye, for both the IPC-HDW5231R-Z, and the IPC-HDW4231EM-AS.
You can also clearly see the Micro SD card slots in both cameras. Be careful, as the wires preventing total separation of the two halves are short. Note: Sometimes, the cameras don’t have the button soldered onto the board, so you have to short the two solder points instead.
Hold the reset button down (or short the two solder points) and apply power. Holding it down during the boot process (~5-10 seconds) should wipe out the existing configuration file and reboot the camera.
Dahua Camera Firmware Rollback / Brick Recovery
Dahua started signing their firmware in 2017 (varies by model), which prevents installation of older, on- signed versions. If you are unable to install older firmware, or inadvertently brick your camera while upgrading, follow the recovery thread:
Dahua IPC EASY unbricking / recovery over TFTP